Getting Started
1. Get a project
GPULab requires a user to be a member of a project on either:
- The Slices Portal.
- The imec Testbed Portal (for UGent/imec IDLab members)
Either request a new project on one of the sites above (for example: a project dedicated to your PhD research), or request to join an existing project if you need to collaborate with other users.
Each project receives a separate project storage on GPULab.
2. Start your first job via JupyterHub
The easiest way to launch your first job on GPULab is to use our JupyterHub instance available on https://jupyterhub.ilabt.imec.be .
Read the Getting Started on JupyterHub guide for more information.
3. Use the GPULab website
GPULab offers a web interface on https://gpulab.ilabt.imec.be.
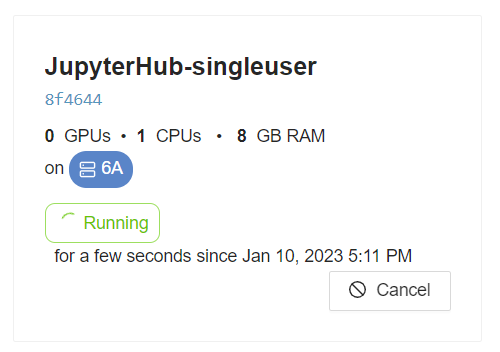
You should be able to see the job containing your Jupyter-instance that you created in the previous step:

Click on this tile to see more details about this job. The website allows you te easily see:
- General info: requested resources, assigned resources, job status and more
- Logs: the output of the process started within the Docker container
- Debugging logs: logs generated by GPULab itself. These come in handy when your jobs unexpectedly fail
- Usage Graphs: see your CPU, GPU, memory and IO usage.
4. Create your first GPULab job
Use the Create Job page on the GPULab website to create your first jobDefinition.
A jobDefinition is a JSON-file while contains all necessary information to submit a GPULab job.
The webpage is separated into two columns: the left column contains a form that you can fill out with all details about the job that you want to submit. The right column shows the resulting JSON file.
Once you’ve filled out the job form, either click the Start button on the bottom of the page, or use the Download jobDefinition File button on the top of the right hand column to download it. This allows you to quickly load the jobDefinition again using the Load jobDefinition File on this page, or to submit it via the GPULab CLI.

