Using the mobile nodes (mobility toolkit)
This is a hands on tutorial, please make sure you’ve quickly went over the Mobility extension architecture and you know how to Making a reservation.
If you want to automate driving (not driving yourself by clicking ‘play’ on RobotDashboard, see later…): * Remember to swap in one additional node (doesn’t really matter which one) to act as communicator/proxy between the Experiment Controller and RobotControl.
When you’ve swapped in the experiment, you can ssh to the robot:
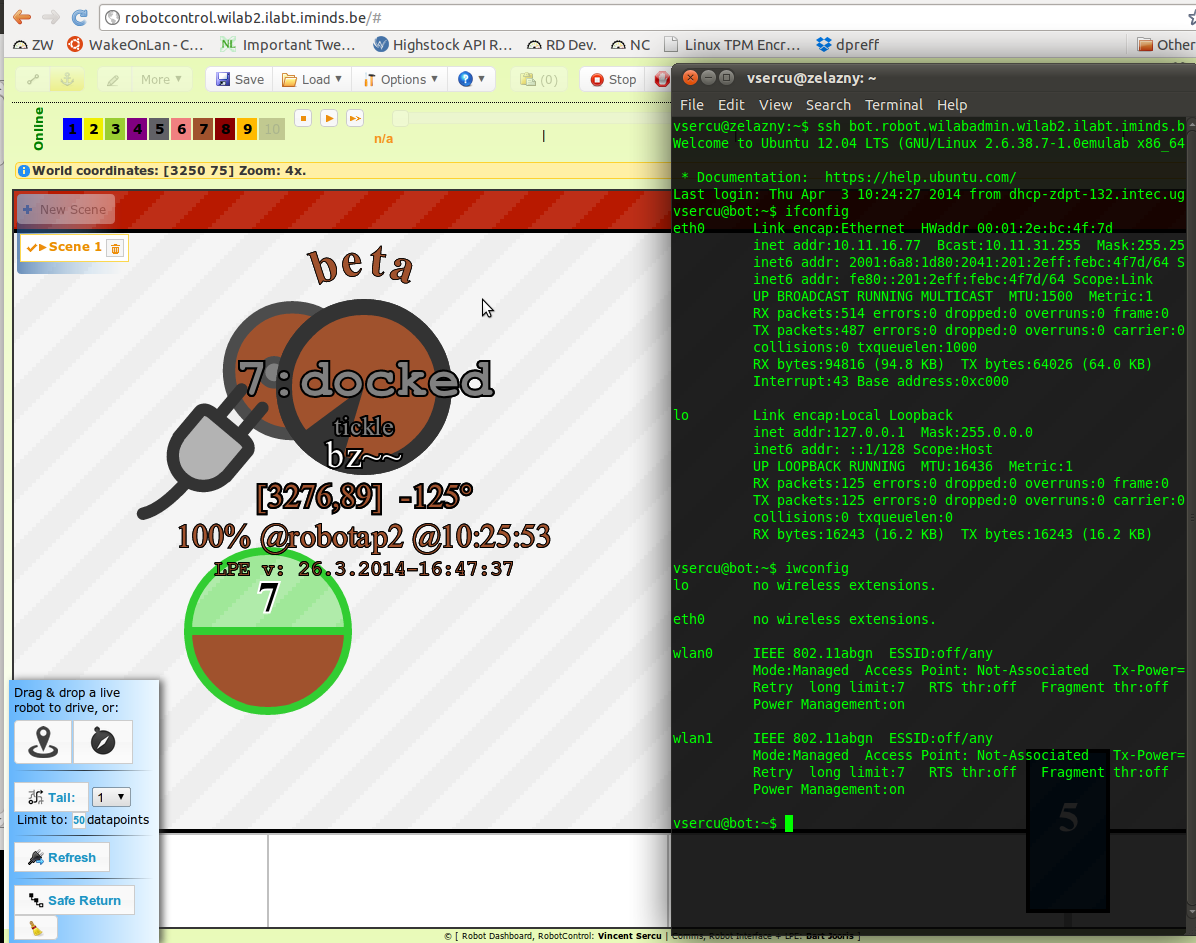
Keep in mind that:
- ssh’ing to a robot is only possible when docked (as the robot is then physically connected with ethernet).
- Set up your own WiFi accesspoints using one of the 2 wlan interfaces on the bot if you want to keep connectivity (see WLAN connectivity)
- The device under test has to be powered, notice second tilde in the substate has changed to ‘z’ (or ‘p’)
Setting up paths
Navigate with a webkit-enabled browser (preferably Chrome) to the RobotControl Server, where you’ll be redirected to the RobotDashboard, a GUI which you can use to draw paths in the Zwijnaarde testbed. Please refer to the help-menu of the RobotDashboard for more information on what the different actions are. Remeber to use the ID of the mobile node you reserved as ID of a robot.
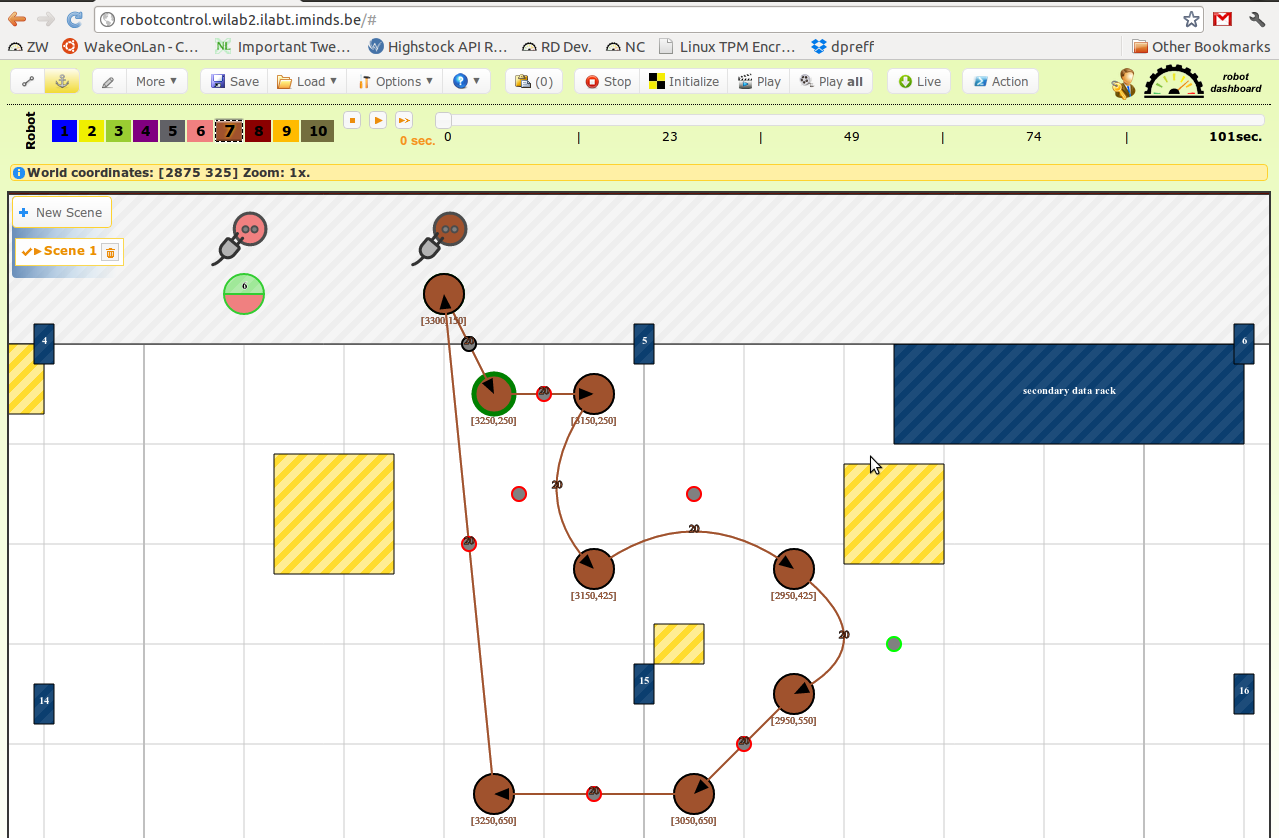
If you’ve made a nice choreography, don’t forget to click ‘save’ and copy paste the CSV-data to a file. This file can be reloaded using the load-menu.
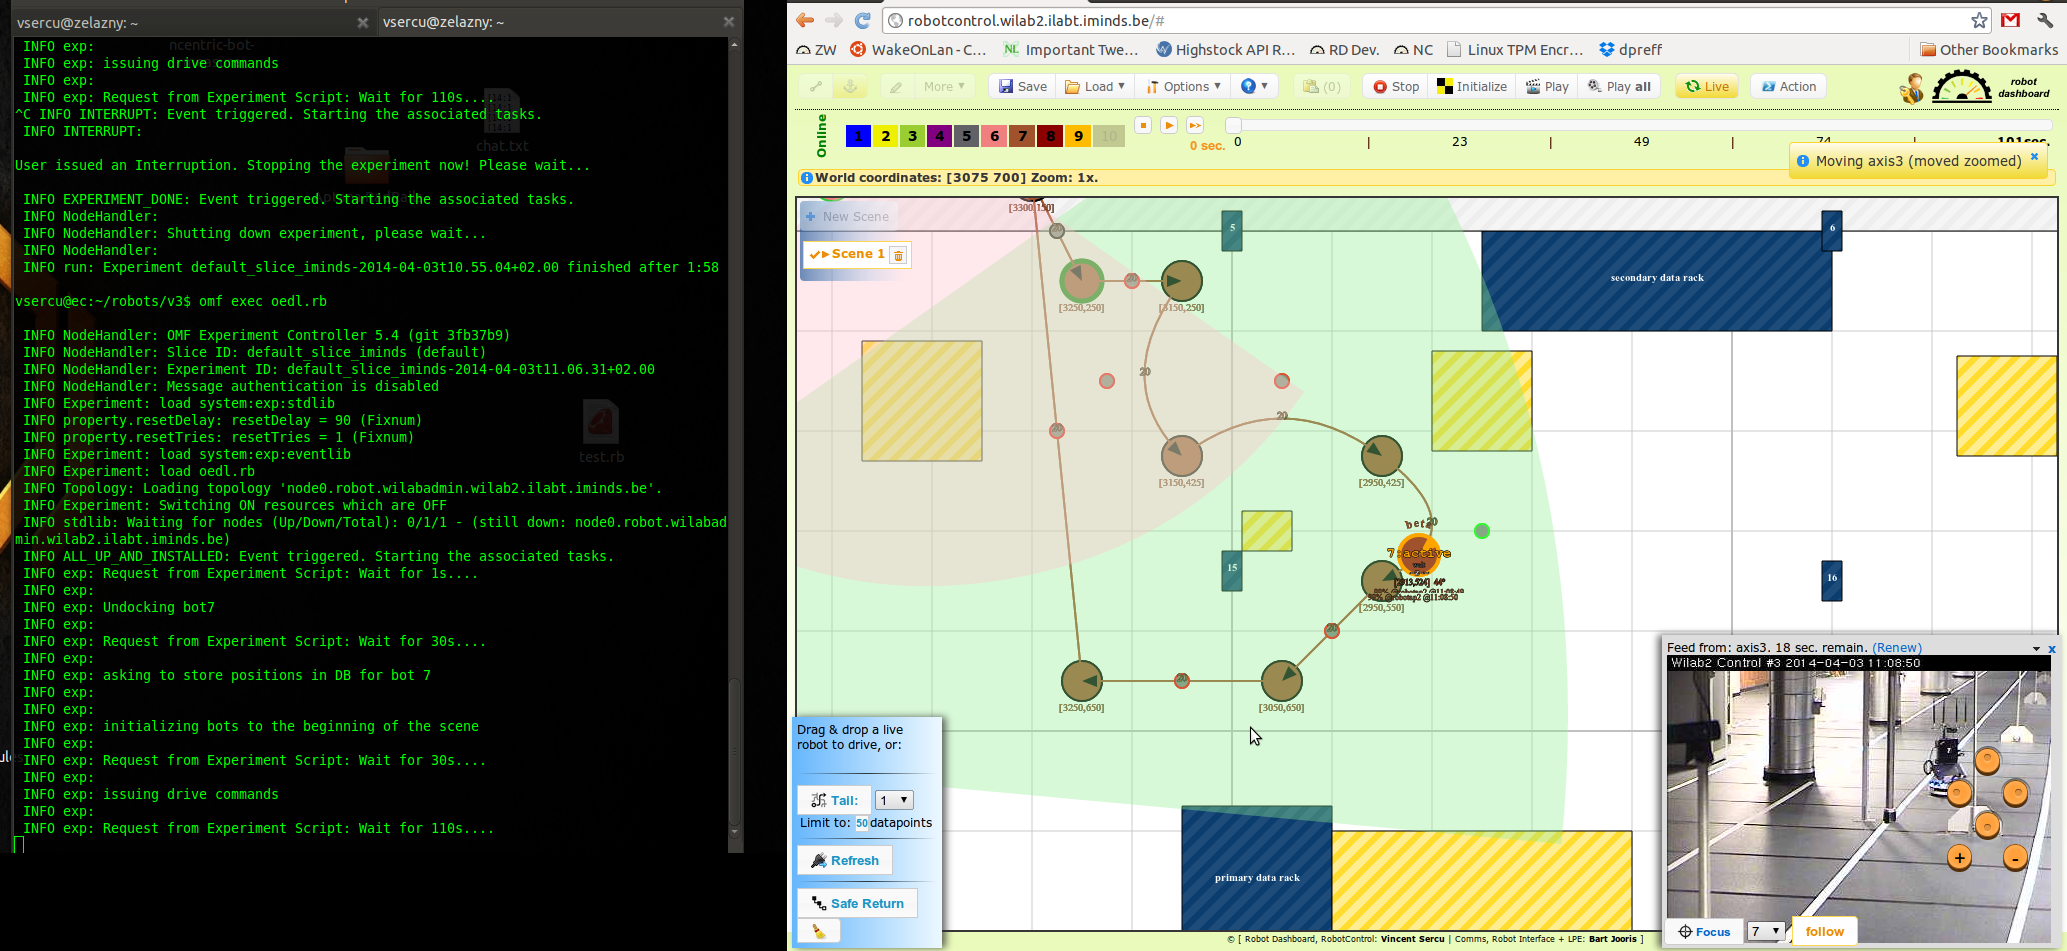
Driving your paths
If you’ve drawn your path you can use the simulator in RobotDashboard to see where robots will be at a certain time, in reference to the start of the scene. It’s possible to drive the robot without OMF, by using the ‘Initialize, Play and Play all’-buttons. But first, you need to login:
- click the red key next to the RobotDashboard logo
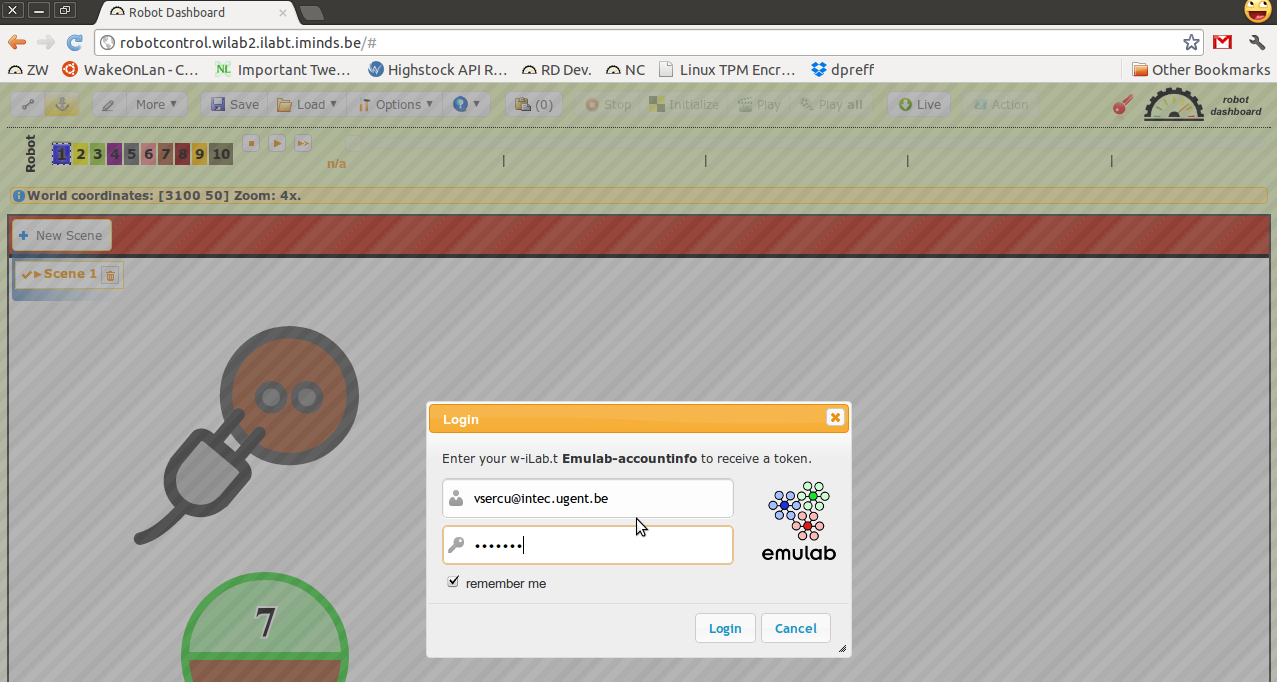
once logged in, you can click the User-icon to see your token:
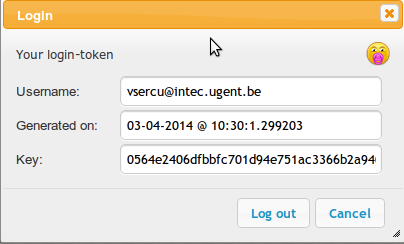
After loggin in, the system will verify if you have a reservation. Keep in mind that this username+date+key combo has to be secret, and everyone who can access it can use it to drive robots under your authority. Tokens are generally valid for a week.
Final steps:
- Via the action-menu or right mouse on a robot, you can choose ‘Auto Dock’ and ‘Auto Undock’, which will put the robots from their safezone in their docking station and vice versa. Do an Auto Undock.
- You can use the Initialize button to set a robot(s) ready at the start of the scene automatically.
- Use the Play-button to let the robot(s) drive the paths you’ve created in the current scene.
- Use the Play-all-button to to let the robot(s) drive the paths you’ve created in the current scene and every scene that follows and that has the autostart-function enabled.
- If you didn’t instruct the robot to return to the safezone at the end of your scene, you can use the Safe-Return function to do this for you.
Automated Robot Driving (with OMF)
The CSV file containing the coordinates can be passed to RobotControlComm.rb script (latest version) This script basically calls the REST-API of RobotControl and makes it possible to:
- Automate driving inside an OMF-experiment
- Log the positions of the robots in a separate table in de experiment-database
- Facilitate automatic actions (undocking, docking, eyes, …)
The proxy node mentionned in the beginning will run this script. Try run the script via ssh first to see all dependencies are installed, if that works, run it with OMF. (Generally only ruby dependencies are required, install them with the command ‘gem1.9.3 install json’ or ‘gem install json’).
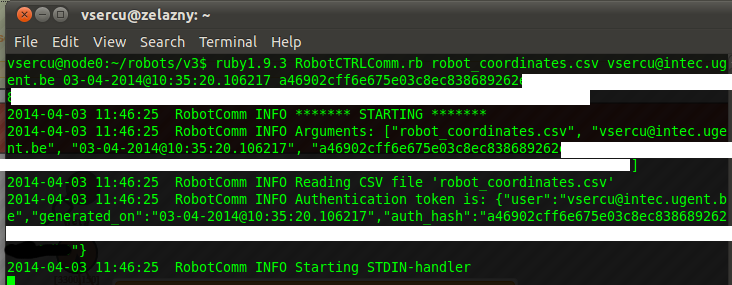
Run the script with:
ruby1.9.3 RobotCTRLComm.rb robot_coordinates.csv vsercu@intec.ugent.be 03-04-2014@10:35:20.106217 a46902cff6e6...
Make sure this file is executable if you wish to run it via omf (chmod a+x RobotCTRLComm.rb)! (note, depending on the used authentication method, you might need to remove the @somedomain-suffix from your username)
Subsequently, create an OEDL that uses this script as an application. It should look something like:
- For OMF5.4: basic robot OEDL example.
- For OMF6: basic robot OEDL example, or check out the /var/www/upload/omf6/robots folder on the ec.wilab2.ilabt.iminds.be server.
When executing this OMF script, the robot will automatically undock, drive its path, and automatically dock in the end.

RobotControl API
See Automated Robot Driving (with OMF) for a Ruby script which uses the RobotControl API. The browser (RobotDashboard) application also uses this API in a similar way. So as long as you stick to the REST nature, you could do virtually anything with scripts.
Somme examples below:
Get locations + various information of all robots:
wget -qO- http://robotcontrol.wilab2.ilabt.iminds.be:5056/Robot/LocationsYaml
Get locations of only robot #1
wget -qO- --post-data="filter=1" http://robotcontrol.wilab2.ilabt.iminds.be:5056/Robot/LocationsYaml
Validate auto generated path for robot #4 and #5 (will reply: ROBOT_COORDS_VALIDATED for success or ROBOT_COORDS_ISSUES and the errors.)
wget -qO- --post-data="data=%23%23%23+Generated+using+some+userscript+22%2F05%2F2018%0A%0A%5B1%5D%0A%23%5BScene+1%5D%23%0A%23+***+ROBOT+4+****%0A4%3BdriveBezier%3B5030%3B270%3B5060%3B210%3B16%3B0%0A4%3BdriveBezier%3B5040%3B340%3B5030%3B310%3B16%3B0%0A%0A%23+***+ROBOT+5+****%0A5%3BdriveBezier%3B4810%3B260%3B4800%3B210%3B16%3B0%0A5%3BdriveBezier%3B4760%3B320%3B4780%3B290%3B16%3B0%0A%0A" http://robotcontrol.wilab2.ilabt.iminds.be:5056/Robot/ValidatePath
Undocks robot 4:
wget -qO- --post-data="actions=4%3Bautoundock%0A&auth=%7B%22auth_hash%22%3A%2225c9-snipped-85226674ca%22%2C%22generated_on%22%3A%2222-05-2018%4011%3A32%3A54.073874%22%2C%22user%22%3A%22vsercu%22%2C%22email%22%3A%22vsercu%40wall2.ilabt.iminds.be%22%2C%22projects%22%3A%5B%22omf%22%2C%22vsercuproj%22%2C%22WiSHFUL%22%5D%7D" http://robotcontrol.wilab2.ilabt.iminds.be:5056/Robot/Action
Basically make sure the post-data is url-encoded when you put in in curl. Easiest is to use Chrome’s debugger (ctrl+shift+i) and do what you want to in the Dashboard, and copy the request.
Troubleshooting
OMF: check the resource-controller log for detailed info (located on /var/log/omf-resctl-5.4.log, in OMF5.4, on the node you run RobotCTRLComm.rb on).
WLAN connectivity
Intro
By default, once a robot is undocked, you have no longer connectivity to its eth0-wired interface.
A workaround would be, if the experimenter still requires access to the mobile node, to use a wifi-bridge. (Needless to say that such a bridge can alter your experiment results if you’re doing wifi-related experiments…)
This tutorial describes how such a bridge is set up. If you do not care about the nodes being reachable over the wireless network when they are undocked, you should skip this tutorial.
One node has to be configured as wireless access point where all the mobile nodes will connect to (use the proxy-node). After connecting, the mobile nodes will be able to access the rest of the wilab2 network (over the wlan0 device).
(all scripts are located on the ops.wilab2.ilabt.iminds.be server)
Select a node as AP
Select one node in the testbed to function as access point for the robots. In your ns-file, add the following line for the selected node :
tb-set-node-startcmd $ap "/share/upload/robots/startAP.sh"
This will configure everything on node $ap and set the IP address of the wlan0 interface to 172.16.0.1/16.
Configure the mobile nodes
The mobile nodes connect to the AP, modify their default gateway and restart the OMF RC so it uses the wlan0 instead of the eth0. Be aware that the eth0 interface will be disabled when running the following script :
tb-set-node-startcmd $robot "/share/upload/robots/startRobot.sh"
The IP-address of the mobile node will be set to 172.16.0.70+robotID. So 172.16.0.77 for mobile7.
If you want to ssh to your mobile nodes, you will have to ssh to the AP first and then use the 172.16.0.X address to ssh to your mobile node. Note that the OMF experiment should only be started AFTER all the mobile nodes have been swapped in (and the RCs have been restarted by the script), else the RCs will not receive the XMPP messages sent by the EC.
Re-enable the eth0 connection
After docking, if you want your eth0 connection back : ssh to the AP, then ssh to your mobile node. After that, run :
ifconfig eth0 up ; route del default gw 172.16.0.1 ; route add default gw 10.11.31.254
Check out the ruby script /share/upload/robots/robot.rb if you want to run the OMF RC over the eth0 again (change config file + restart RC).

