Creating an experiment with a mobile node
1. Create & Activate your experiment using jFed
Follow these steps to activate your nodes using jFed:
- Fire up jFed by browsing to the jFed website, browse down and click Quickstart Experimenter GUI. Select Login with Fed4FIRE-credentials, provide your password and click Login.
- If this is the first time you are using jFed to activate nodes in the iMinds w-iLab.t testbed, you have to enable the proxy first. Click on Preferences, select the Proxy tab and click Run Proxy Test. Select the Always option for both Proxy for jFed and Proxy for SSH connections.

- Click on New
- Drag in 3 wireless nodes
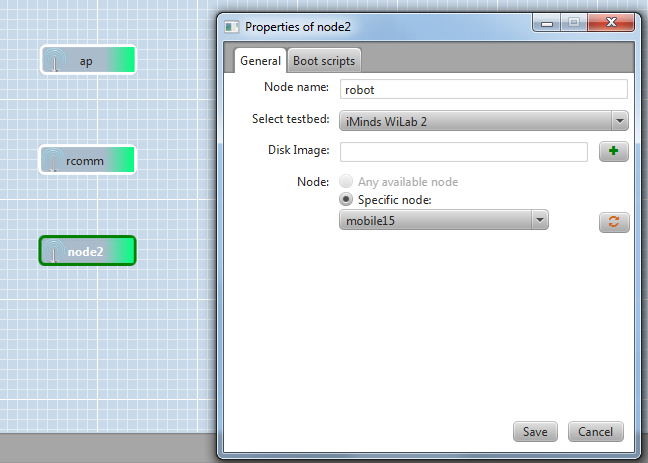
- Right click, Configure Node to change the properties (name/testbed/disk image/specific node). For now, uncheck the “Show only available nodes”-checkbox, as the reservation system is not synced with jFed fully
- Name the two fixed nodes: ap and rcomm. Choose one mobile node (mobile1 .. mobile15) and call it robot.
- By default, the iMinds w-iLab.2 testbed should be selected (because we picked wireless nodes)
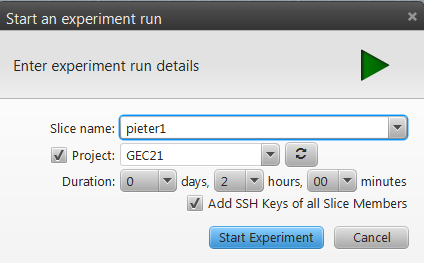
- Click Run to start your slice (Green arrow on the top left) and fill in a unique name for your slice.
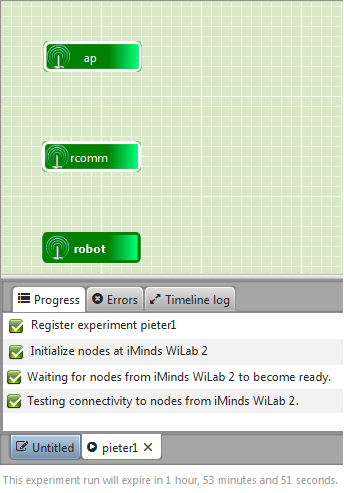
When all nodes turn green, your experiment is succesfully activated.
2. Configuration of Access Point
SSH to your AP node (double click it in jFed). Become root:
$ sudo su
Create a config file for the hostapd program:
$ nano /root/hostapd.conf
Add the following content to the config file:
interface=wlan0
driver=nl80211
country_code=BE
ssid=demoX
hw_mode=Z
channel=Y
Replace X with a random number. Replace Y with your channel(1-11 for g, 36/40/44 for a) and Z with the WiFi mode (a or g). Start hostapd. The above config will setup an AP on wlan0 using 802.11a or g, channel Y, with SSID demoX:
$ hostapd /root/hostapd.conf
Open a second ssh terminal and give an IP address to the wlan0 interface so we can test the connection to the clients (in the next steps). Be sure to replace X with your number:
$ sudo su; ifconfig wlan0 192.168.X.1/24
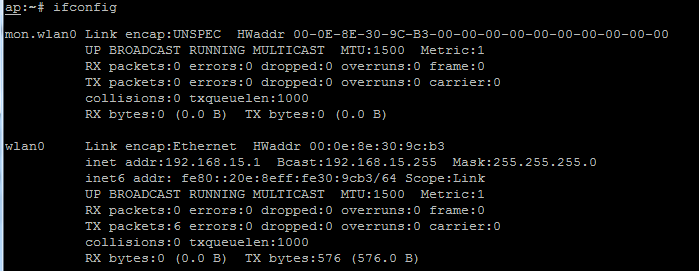
Running the ifconfig command should show a wlan0 and mon.wlan0 interface:
3. Configuration of client (robot)
Become root:
$ sudo su
Put the wireless interface into managed mode and specify the SSID so it knows to which AP it should connect
$ iwconfig wlan0 mode managed
$ iwconfig wlan0 essid demoX
Specify an IP address and bring up the interface:
$ ifconfig wlan0 192.168.X.10/24 up
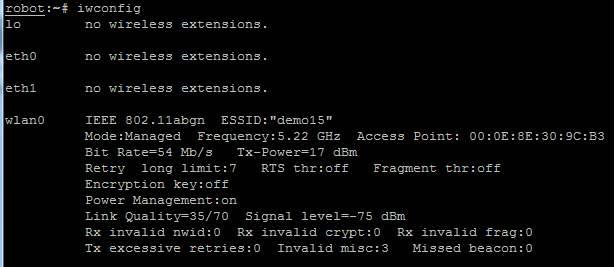
Running iwconfig should show that wlan0 is connected to an access point with your ESSID:
Check if you can ping the AP:
$ ping 192.168.X.1
4. Start the iPerf throughput measurements
Start an iPerf server instance (UDP in this case) on the AP:
$ iperf -s -u -i 1
Configure the iPerf client (on the robot):
$ iperf -u -c 192.168.X.1 -b 30M -i 1 -t 6000 &
On the server, you should see some output like below:
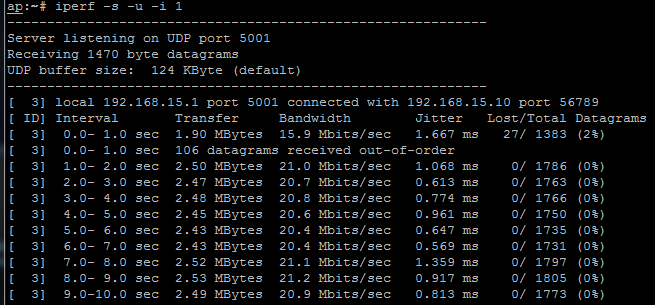
By tweaking the transmit power (values of 0 to 17dBm) of the access point, you should be able to see a difference in throughput of the iPerf stream (open up a new SSH session to your AP to play with the TX power):
$ iwconfig wlan0 txpower <0-17>
For this tutorial, leave the txpower set to default (17 or 20dBm) for the first experiment runs. If the effect of moving the mobile node is too limited, you can try lowering the txpower. Note that each antenna at the w-iLab.t is equipped with a 10dB attenuator (so 20dB attenuation per link).
5. Operate the mobile nodes
Once everything works fine, you can start driving the mobile node and check the impact on the iPerf throutput. Note that you will lose your SSH connection to the robot when it is no longer in its docking station.
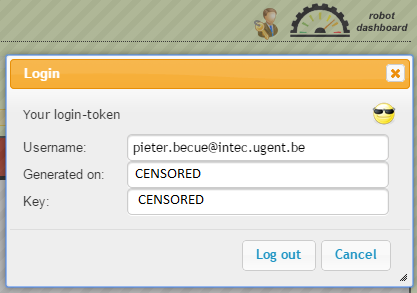
The Robot Dashboard can be accessed here. Be sure to use a recent Chrome or Safari browser. If you imported your p12 certificate into your browser, you can login by clicking the red key (top right of the dashboard). Select the Fed4FIRE SFA tab and click Login. If you now hover over the key (hopefully not red anymore), it should show your login name. You will only be able to move robots which are reserved by you.
Now start drawing a path for your robot by selecting the robot ID on the top left of the Robot Dashboard. On the top left, you can also choose between straight paths and bezier curves.
Always start your path by clicking on its Safe zone (the circle below the charging station with the ID of the robot in it) and dragging towards a location of your choice. Be sure that you don’t cross any obstacles (marked in yellow or blue). If you do cross obstacles, the Robot Dashboard will tell you (and you will not be allowed to start driving that path). Add some more segments to your path and make sure that your robots returns somewhere near its safe zone (circle with ID of the robot) at the end of your scenario.
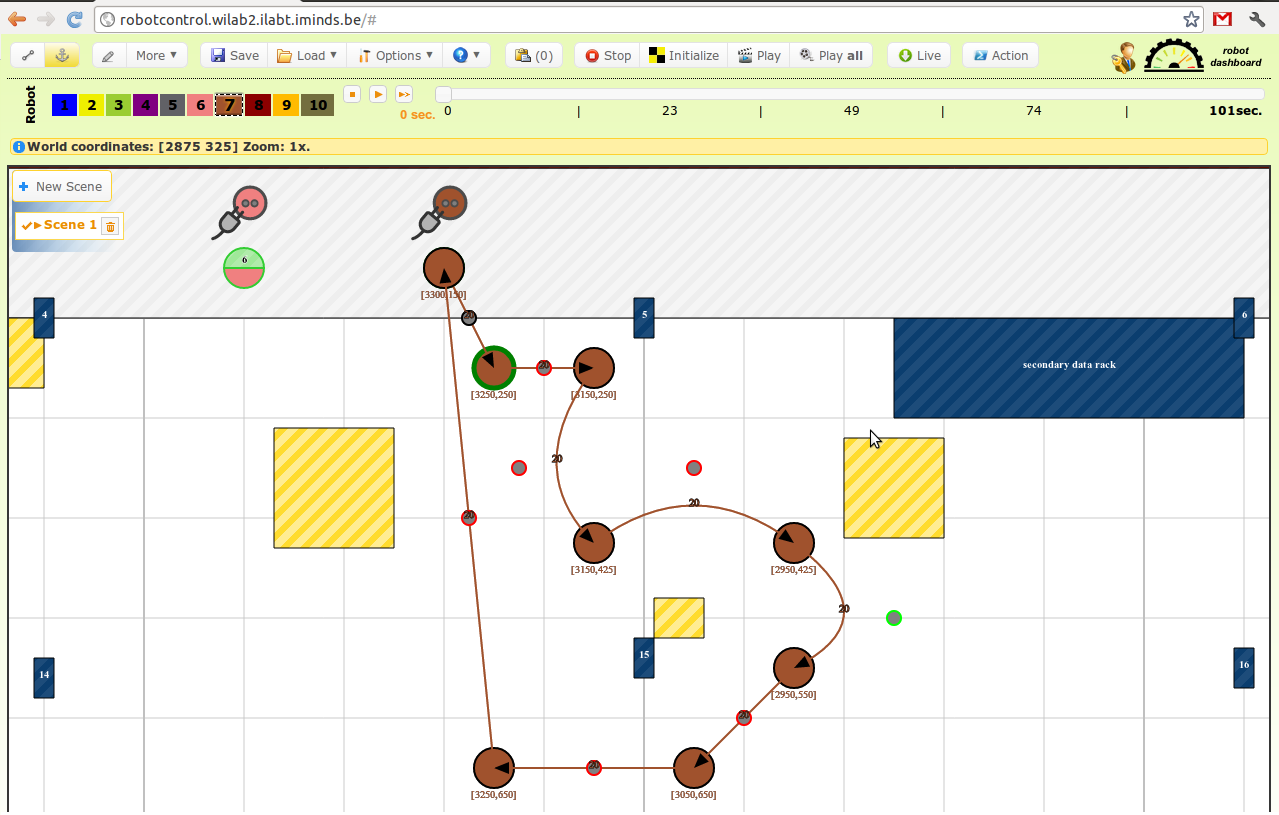
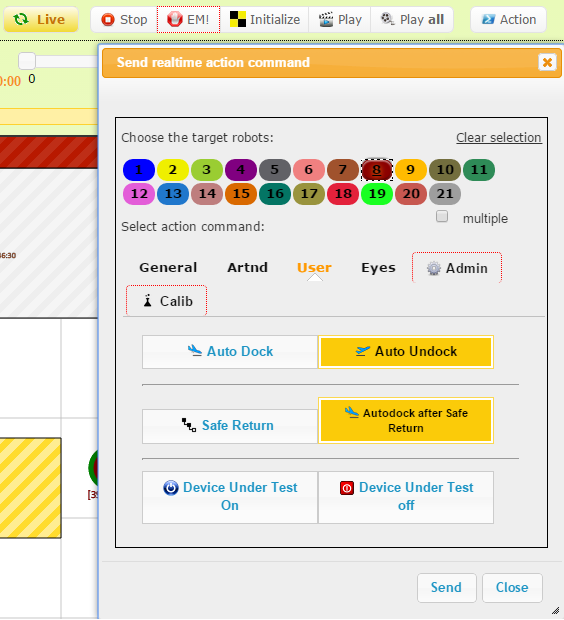
If you are satisfied with your path, click the Live button, followed by Action. Go to the User tab, select Auto Undock and hit the Send button. Alternatively, you can right click on a robot and select Auto Undock.
VERY IMPORTANT : You will only be able to SSH to the mobile node while it is docked. (If you want an SSH connection during your experiment, you will have to set up a wireless connection to a fixed node and SSH over the wireless.)
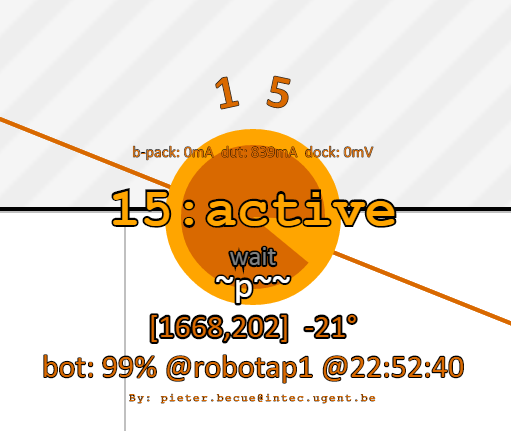
Click on Initialize to taxi the robots to their starting position (check the top right of the robot dashboard for errors). If no errors occured, hit the Play button. You should now see the status of your robot changing to Active and see it moving around.
At the end of your experiment, click on Actions again, go to the User tab, select Auto dock and hit Send to park the robot in its docking station. If the robot is too far away from its docking station, you should use the Safe Return option, which will automatically search for the shortest path towards its docking station.

