Run your first experiment (users of OLD emulab interface)
Run your first experiment on w-iLab.t Zwijnaarde The w-iLab.t Zwijnaarde testbed is managed by the Emulab framework in combination with the OMF experiment control tool. This tutorial will show you how to apply for an account and create your very first experiment. The goal of this experiment is to reserve some wireless nodes in the w-iLab.t Zwijnaarde, select an operating system and bring them up so we can SSH to them.
1. Request OpenVPN account The w-iLab.t Zwijnaarde nodes and servers are available over IPv6 without the need for a VPN connection. However, if you do not have IPv6 enabled at your office, please apply for an OpenVPN account.
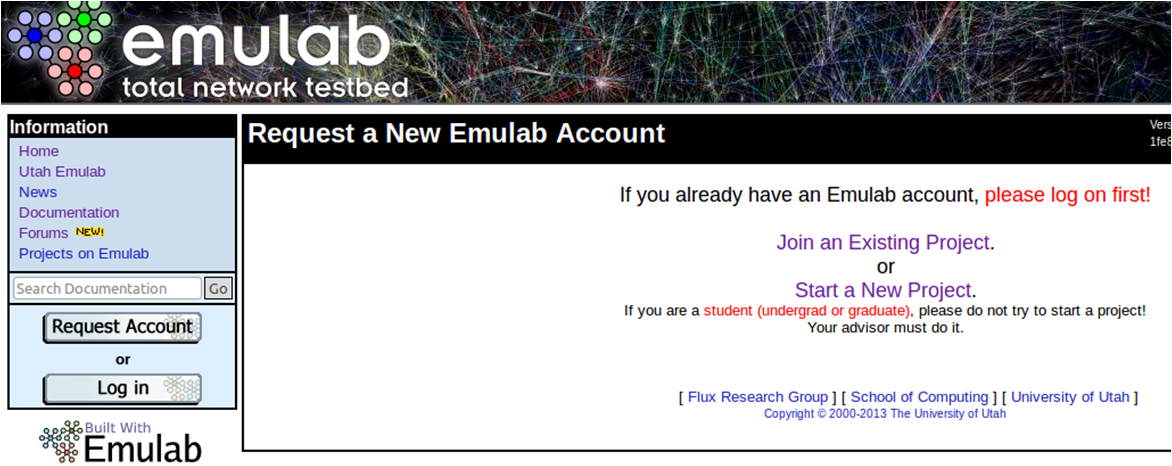
2. Request an account on w-iLab.t Zwijnaarde Browse to the w-iLab.t Zwijnaarde home page and click “Request account”. If you were invited to join an existing project, please click the correct link. If this is not the case, just Start a new project and fill in all the fields of the form. Please pick an appropriate name for your project and add a meaningful description. Make sure the “Home Page URL” is an existing web site, or your request will not go through.
3. Create a new experiment Once your project has been approved, you will be able to log in. Create a new experiment by pointing at the Experimentation menu and clicking Begin an Experiment. Now click on New GUI Editor to start the graphical experiment editor.
Click and drag some nodes into the white field.

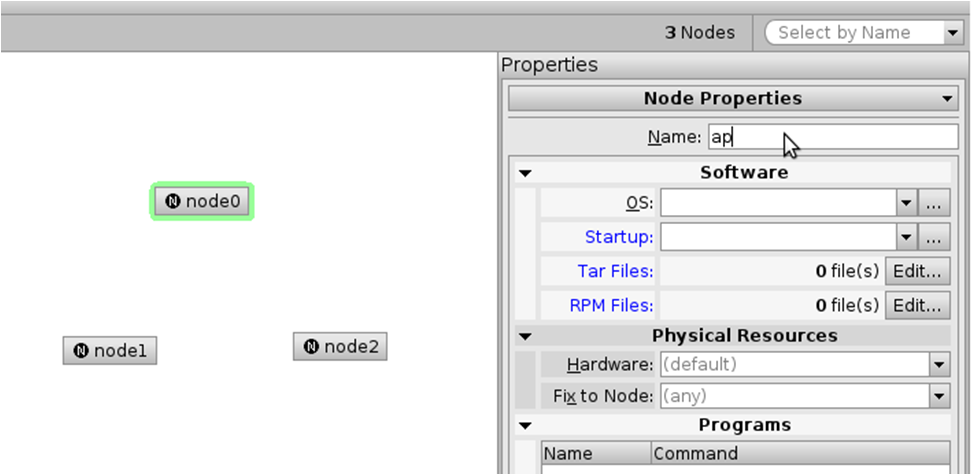
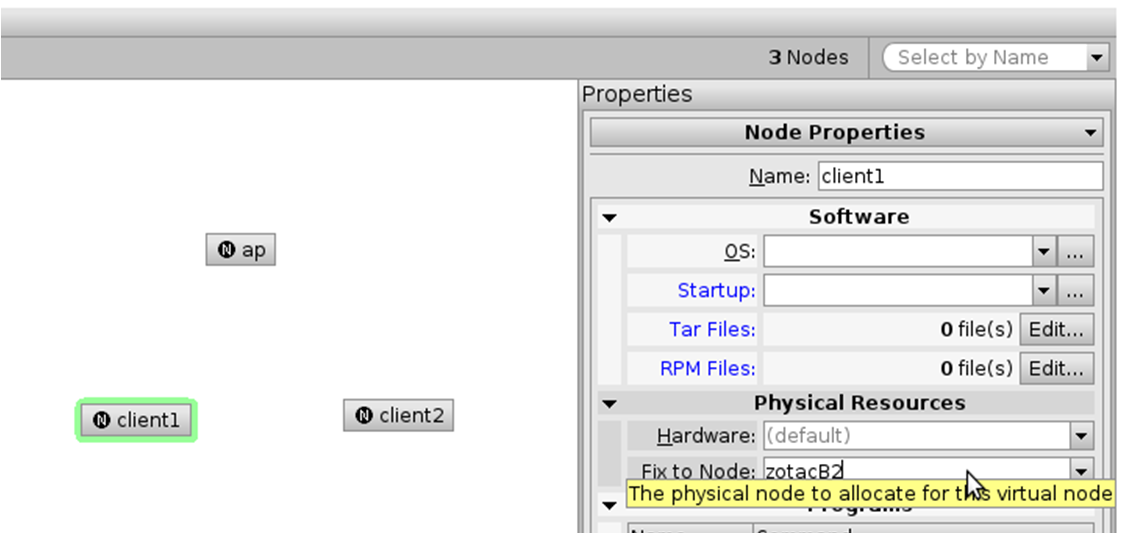
Select a node and give it a name. This name will be used as part of the DNS name of your node (which you will need for your OMF experiment description in the advanced tutorials). This name should be different from the physical node ID ( e.g. zotacB2, zotacK6). Do NOT draw any links between the nodes ! Links define wired experiment interfaces (which the zotac don’t have). The experiment interfaces of the zotacs are the wireless interfaces, but you should not define these in the Emulab experiment.
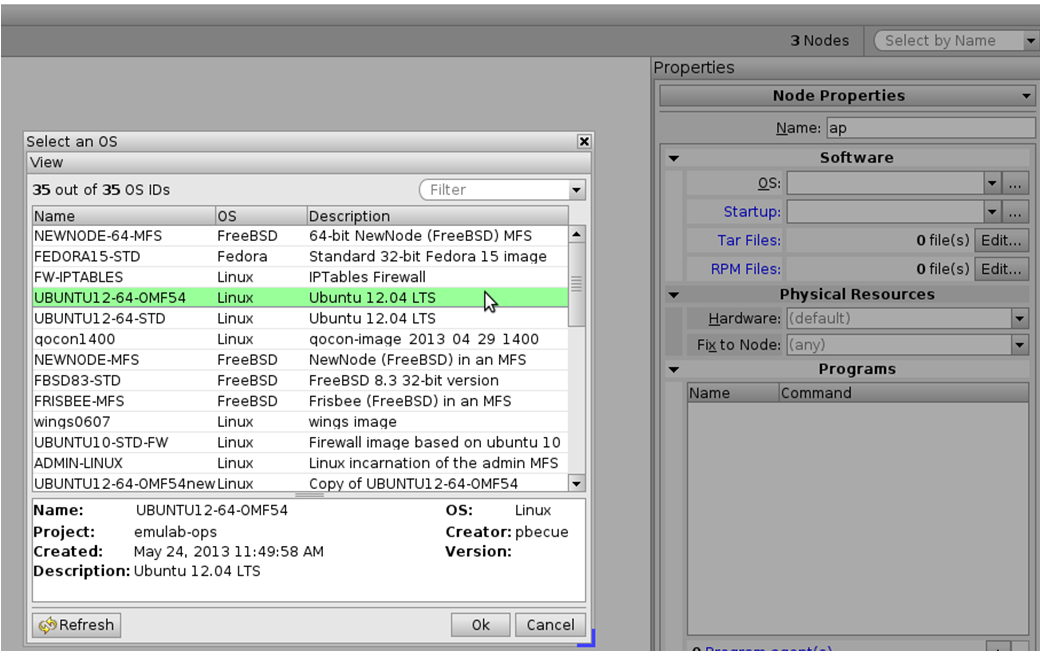
Select an Operating System (Click on ‘…’ to get a list). The default OS is UBUNTU12-64-OMF54. This image is based on Ubuntu12.04 64-bit and has both an OMF5.4 and OMF6 Resource Controller pre-installed. If you use the default OS (recommended!), then you can leave the OS field blank.
Fill in the Fix to Node field if you want to use a specific node. Leave the field blank if you want Emulab to choose a random node for you. See the topology map for the physical node ID’s (e.g. zotacH4).
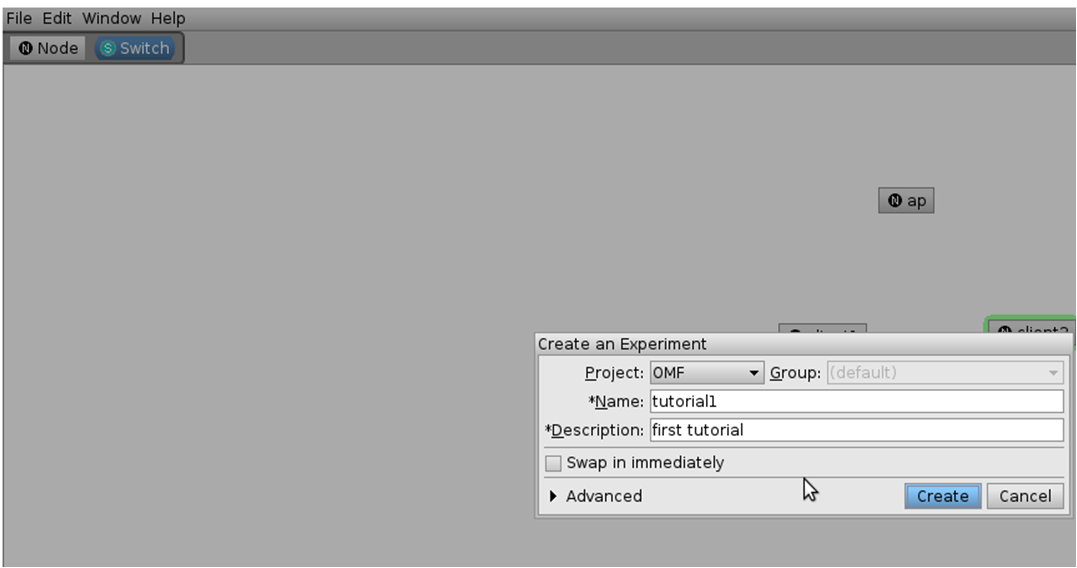
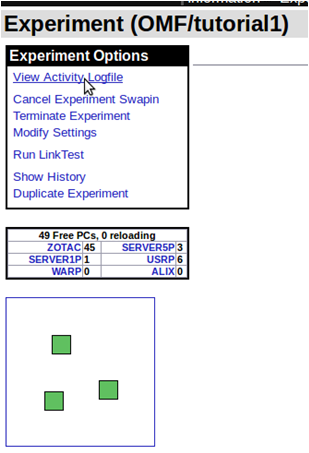
We are done! Just click File > Create new experiment. Select your Project, pick a name for the experiment and fill in a short description.
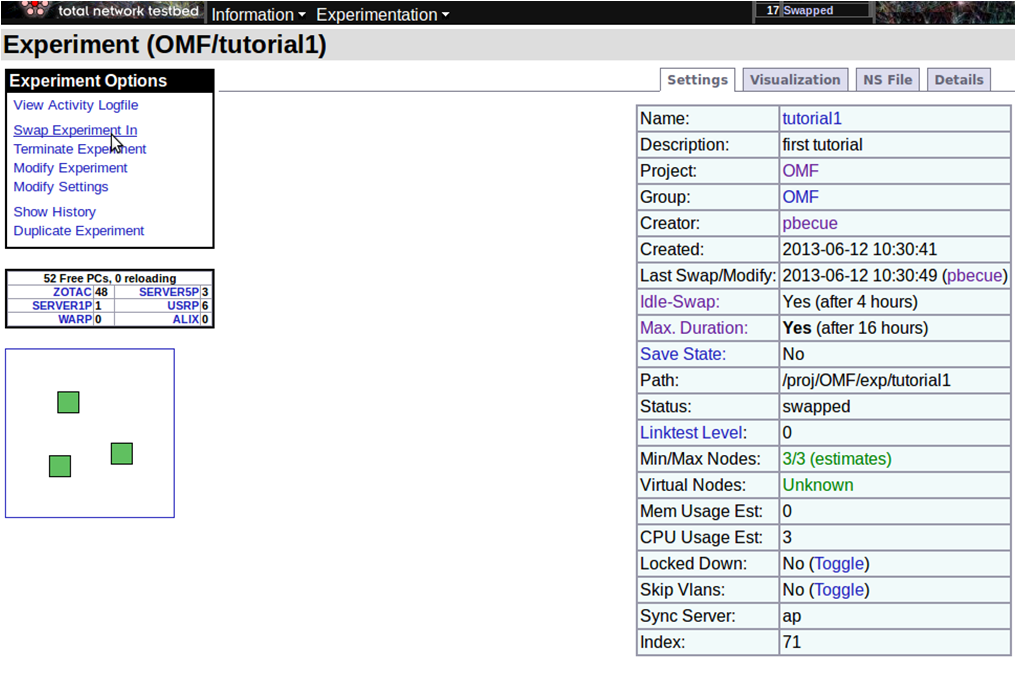
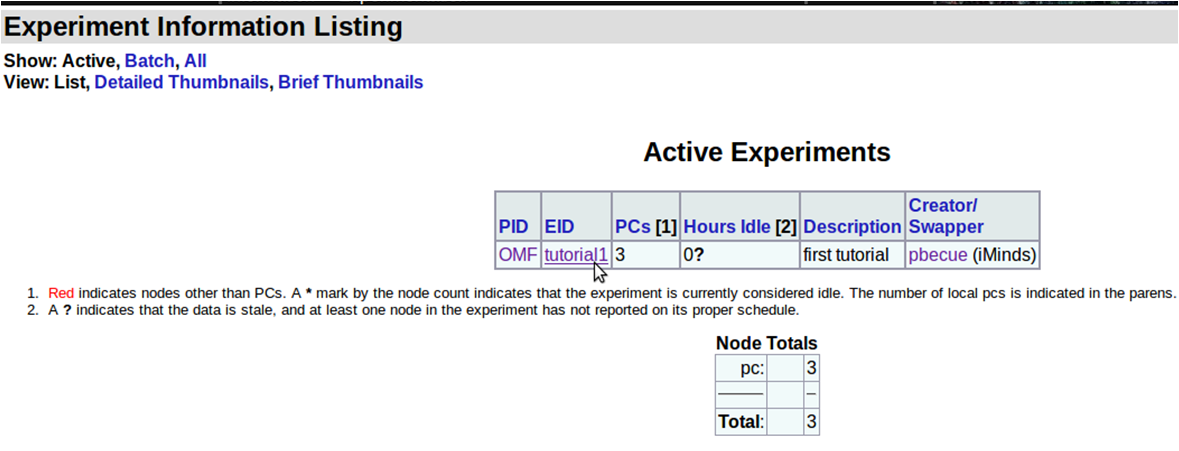
You can now see your experiment details (including the ns file) by pointing to the Experimentation menu and selecting Experiment List.
4. Reserve your experiment Now that we have created an experiment, we should reserve a time slot where we can run our experiment. Browse to link http://wilab2.ilabt.iminds.be/reservation http://wilab2.ilabt.iminds.be/reservation and log in with the same credentials as the w-iLab.t Zwijnaarde home page. Check the reservations table (in combination with the Nodes Overview page) for a free slot and click “New reservation”.
Fill in start date, end date and select the correct experiment from the drop down list. When you require a free wireless spectrum on a certain band, please specify it in the comments (e.g. : 5GHz free required) so other users can take it into account when reserving their experiment.
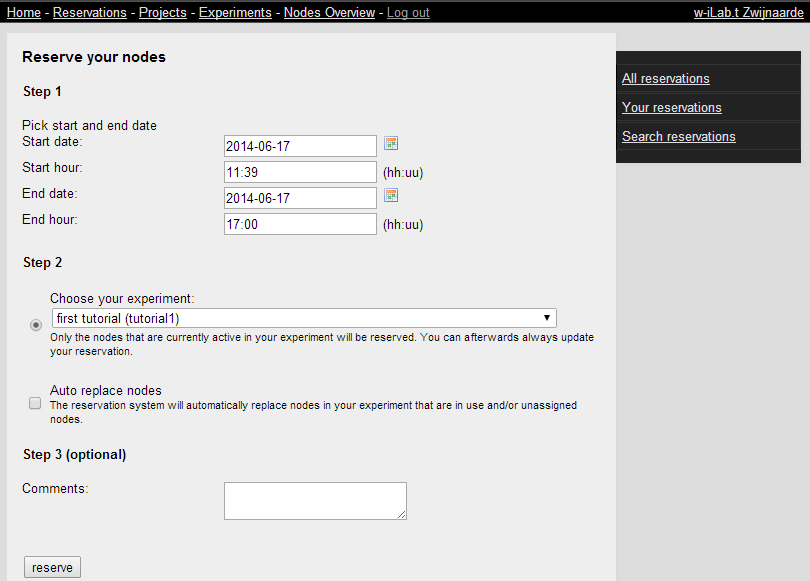
When some nodes in your experiment are not available during the requested time slot, an error will appear listing the occupied nodes.
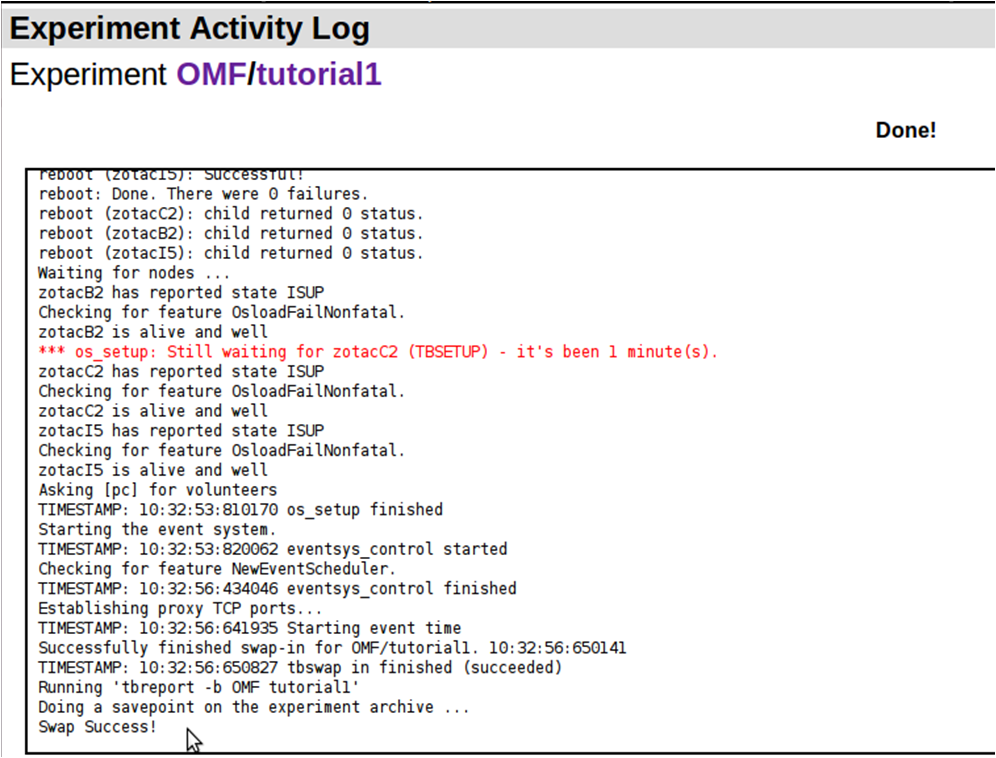
5. Activate your experiment When you enter a reservation, the system will automatically try to activate your experiment at the specified starting date and time. If you want to activate your experiment yourself, just browse to the home page (link wilab2.ilabt.iminds.be http://wilab2.ilabt.iminds.be), log in, select Experiment List from the Experimentation menu and click on your experiment. You can now click Swap Experiment in and check the Activity Logfile.
If everything goes well, you should get the message Swap Success at the end of the log file.
6. Log in to your nodes In the experiment details, you can retrieve the DNS name of the nodes in your experiment. You can use this DNS name in combination with your SSH client of choice to log in to the nodes. Please be aware that if you do not have IPv6 connectivity, you will first need to activate your OpenVPN connection before logging in to the nodes.
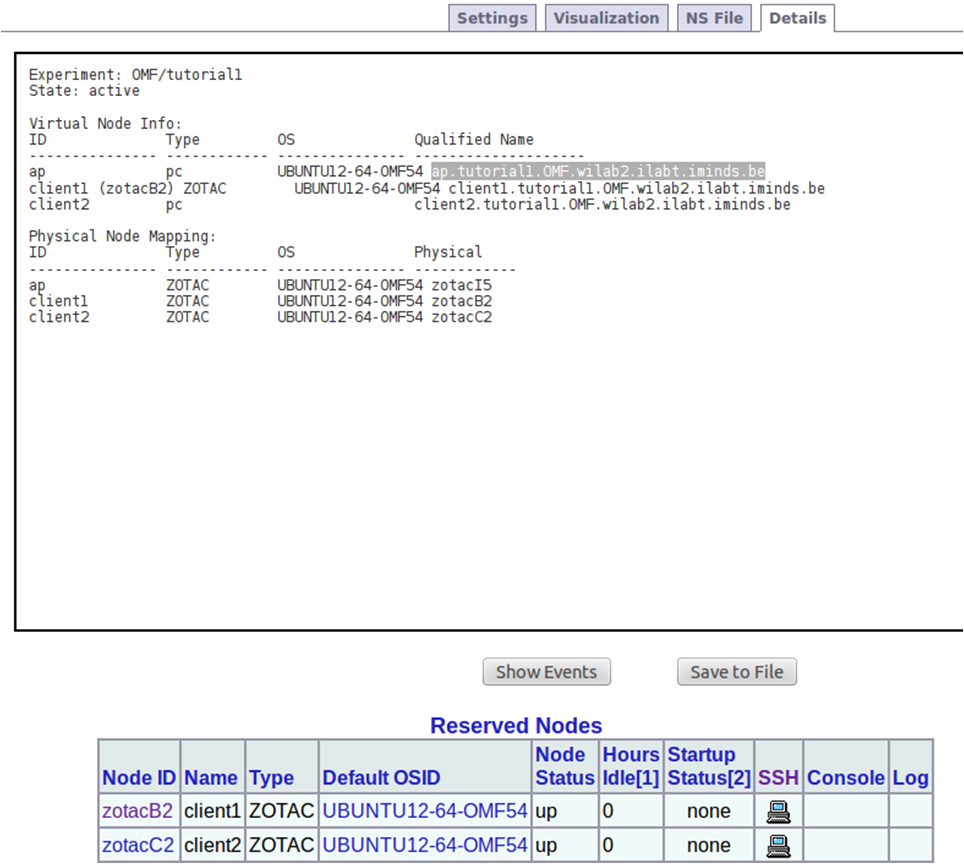
You can use the same credentials from the home page to log into your nodes.
If you want to set up a first experiment with an access point and a client, please check out this tutorial : http://fed4fire-testbeds.ilabt.iminds.be/ilabt-documentation/tutorials.html .
7. Finish your experiment Select your experiment and click Swap experiment out. Be aware that this will re-load the baseline operating system and thus will undo all your changes and delete all your files. This reload usually takes 15 minutes.

