Other jFed software
jFed features a number of other tools next to the jFed experimenter GUI.
Overview
GUI tools
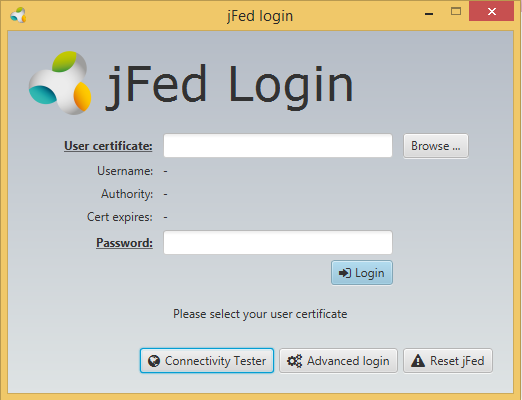
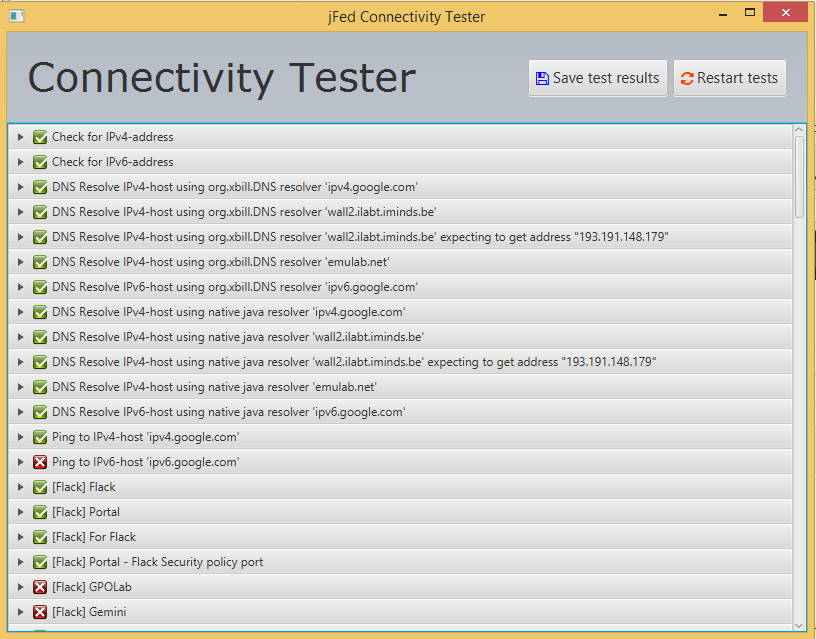
The jFed Connectivity Tester is part of the jFed Experiment GUI, but can be used without logging in to the actual GUI. So you do not need an account to use it. The Connectivity Tester is useful to debug connectivity problems. It runs a number of connectivity tests, and then shows a report. This report can also be saved to disk.
The jFed Probe GUI is a tool for manually calling servers. Very low level calls can be made, and low level replies are visible. This tool requires knowledge of the communication APIs, and the tool itself is not a very user friendly GUI. It can be very valuable for testbed developers that wish to debug their server.
The Automated Testing GUI: This tool is used to run tests scenarios on servers. This is only useful for server developers, and it is not a very user friendly GUI. It includes simple tests, such as veryfing if the GetVersion reply of an AM server is correct, and more complex tests, such as verifying if an AM can correctly provision a node, and if that node can be logged in to using SSH.
The jFed Scanner GUI: The jFed configuration contains information on each server that jFed can communicate with. This tool is used to scan a server and automatically fill in this info. It is of interest to server developers, and users that which to use jFed with a server not known to jFed.
The Bugreport Viewer GUI: Is a standalone viewer for the bugreports that the jFed Experimenter GUI sends. This is only of interest to the jFed developers.
ClI tools
The jFed Experiment CLI can execute some tasks from the command line, for full info, see Experimenter CLI 1 (legacy). There’s also a second version, which exactly matches the actions jfed performs, and has some extra features, see Experimenter CLI 2.
The jFed Probe CLI has the same functionality as the jFed probe GUI, but it is a CLI instead of a GUI. This tool is not actively maintained, and not user friendly at all, even for a CLI. It can be useful for certain automation tasks. Contact the jFed authors if you think this tool is useful for you, or consider using Geni’s OMNI tool, or the jFed Experimenter CLI. The only advantage of the probe CLI over these tools is that it can send some m low level calls that the other tools cannot. An other alternative to using this CLI, is integrating the jFed library itself in you java project.
The Automated Testing CLI: This is the CLI version of the the Automated Testing GUI
The jFed Scanner CLI: A CLI tool related to the scanner GUI. This is no longer maintained.
Software libraries
The jFed core library is a java library that is the is the core of all jFed tools. It is open source and can be used for server communication.
The jFed RSpec library is a java library for RSpec parsing and manipulation. It is open source and can be used for RSpec manipulation.
The jFed Test Assistant is a library that allows java software to use jFed easily in unit or integration tests.
Fedmon
The Fedmon software suite powers https://flsmonitor.fed4fire.eu. This site monitors the status of servers in the Fed4Fire and Geni federation. This software is a seperate project that uses the automated testing library of the jFed software.
The last version of jFed also depend on the Fedmon Web API which is part of Fedmon.
Testing Connectivity
What is the Connectivity Tester ?
You can follow the following procedure to test connectivity from a location (e.g. meeting room, hotel, …). You don’t need an account for testing this.
Installing the Oracle Java JRE and start jFed
Follow the steps in the Get Started to install the Oracle Java JRE and start the green button ‘Quickstart Experimenter GUI’. You don’t need to install an SSH client for this test.
Starting the connectivity test
Then click the Connectivity Tester button at the bottom left, see screenshot below.
After the test has finished, you can click the ‘Save test results’ button, and save the results in a local file. The file can then be emailed e.g.
Experimenter CLI 1 (legacy)
Note that this version of the experimenter CLI is no longer maintained, and might not be included in newer jFed releases. To avoid any confusion, the newer CLI will always be called experimenter cli 2. For more info on the new version of the CLI, see Experimenter CLI 2.
Overview
The jFed experimenter CLI is used to create slivers easily from the command line.
The tool takes a command as first argument, and several options depending on the command.
The supported commands are:
create- Create one or more slivers. And optionally the slice used. Ansible playbooks can also be executed once everything is ready.
delete- Delete the specified slivers.
status- Get the status of the specified slice.
manifest- Locally store the manifest RSpec of the specified slice (use
--manifestto override the default location). This can also be used to generate ansible config files, using the--ansible-diroption, and to execute ansible playbooks. renew- Renew the expiration time of the slivers
userinfo- Fetch user info: urn, slices and projects
This command requires minimum version
develop 172of the jFed CLI poa- PerformOperationalAction. On emulab based testbeds this can be used to reload or restart nodes, and to get a console URL.
createslice- Create a slice, but allocate no resources (= create no slivers)
slice-info- Retrieve slice info. This also tries to retrieve a list of all slivers. It does not query the sliver status. (use
statusfor that).
The first 4 commands are based around the user’s request RSpec. So, delete, status and renew all need the request rspec as parameter.
These commands also require slice information (to create or use a slice).
The userinfo command does not require as much information, as it only fetches user information.
The poa command requires a target sliver URN and an action to execute.
The createslice and slice-info command only require user and slice information.
Configuration
The CLI shares its configuration with the experimenter GUI. The easiest way to edit the configuration is using the experimenter GUI.
You can also edit the file ~/.jFed/experimenter-ssh.properties directly.
Typical settings to change are exogeni settings, and proxy settings.
Download and Run
Go to the jFed download page and download the jFed CLI package at the bottom of the page. You can also download a development version. Note that the top build on that page is the latest version. Click on the build of your choice, and on the next page, download the “jFed CLI (archive)”.
In both cases, you will download a file called jfed_cli.tar.gz. Extract this file to a directory and go to that directory.
Here you will see experimenter-cli.jar and a lib dir. These are both required to run the Experimenter CLI.
Linux CLI example:
user@laptop ~/Downloads $ tar xfz jfed_cli.tar.gz
user@laptop ~/Downloads $ cd jfed_cli
user@laptop ~/Downloads/jfed_cli $ ls
automated-testing-5.2.0-SNAPSHOT.jar  experimenter-cli-5.2.0-SNAPSHOT.jar  lib  probe-cli-5.2.0-SNAPSHOT.jar
user@laptop ~/Downloads/jfed_cli $ java -jar experimenter-cli.jar
Syntax: jfed-experimenter-cli <command> [command_options ... ]
Available Commands: create,delete,status,renew
Usage
The tool is a java jar, so you need to use java to run it.
The create command takes a number of mandatory arguments:
-p <login PEM file>The PEM login file that identifies you as an SFA user.
This file contains one or more certificates, and a matching private key.
Example content:
-----BEGIN RSA PRIVATE KEY-----
Proc-Type: 4,ENCRYPTED
DEK-Info: DES-EDE3-CBC,B9AFE3F639D6D355

oDj5CQZ68EqY... (multiple lines) ...
-----END RSA PRIVATE KEY-----
-----BEGIN CERTIFICATE-----
MIIEBzF... (multiple lines) ...
-----END CERTIFICATE-----
-P <PASSWORD>The plaintext password that locks the private key. If this option is not provided, and a key is requested, the password will be requested on
stdinby the CLI.Note that not all private keys are password protected and that you can remove the password from a private key using the openssl tool:
openssl rsa < password_protected_file.pem > unprotected_file.pem
(important: the
unprotected_file.pemfile will only contain the unprotected RSA key. Any certificate inpassword_protected_file.pemis not copied tounprotected_file.pem. This can be done manually)
The following options are mandatory for all but the userinfo command:
--rspec <rspec file>- The request RSpec that specifies the sliver(s) to be created.
--slice <slice name or URN>- The name of the slice in which the slivers(s) need to be created. This can be an existing slice, or a slice that needs to be created. In the later case, you need to also privide the
--create-sliceoption in order to confirm that the experimenter CLI must create the slice for you. You may choose to either provide just the slice name, or the full slice URN. Both will work. --project-name <project_name>or-S <project_name>- In case you used the
--sliceoption to specify the slice name instead of the URN, you might want to specifiy the project name (sometimes refered to as sub authority). If you do not specify a project name, no project will be provided. Some authorities do not allow this. You can also specify the special valueCHOOSE_AUTOMATICALLYas project name. In that case, the CLI will contact the SA and request a list of projects you are a member of, and automatically select the last project.
There are also a number of optional arguments. These are for settings for which the experimenter CLI has reasonable defaults. The arguments include:
--expiration-hours <integer>This option is used to specify when the slivers should expire. If a slice is created, this is the slice expiration time as well. This argument is specified as the number of hours from the current date. The default for this option is 2 hours.
Note that for both slice and sliver expiration time, the server might not honour your request, and return a longer or shorter time than what you requested.
--ssh-keysThis option can be used to specify which ssh public keys should be added to the nodes when creating slivers. This option takes a comma seperated list of public key source identifiers. The default value is:
usercert,rspec,shareduserallkeysThe 4 supported identifiers are:usercert- The certificate used to authenticate contains a public key, which will be used as an ssh public key and added to created slivers. This way, you can login to the nodes using the matching private key.
userkeys- The server contains information on user public SSH keys. If this identifier is added, this information is requested, and the public ssh keys of the user are added when creating slivers.
shareduserallkeys- Add all ssh keys that are stored on the server for all users the slice is shared with. This will also request these users login certificate SSH key from the server.
rspecThe RSpec file can contain a list of public SSH keys. If this identifier is added, these are added when creating slivers.
To add public keys to an RSpec, add this as last child element of the
<rspec>element:<jfed-ssh-keys:user-ssh-keys user="urn:publicid:IDN+example.com+user+foo"> <jfed-ssh-keys:sshkey>ssh-rsa AAAAB.... foo@laptop</jfed-ssh-keys:sshkey> </jfed-ssh-keys:user-ssh-keys>
You may also need to add the correct namespace to the
<rspec>element:xmlns:jfed-ssh-keys="http://jfed.iminds.be/rspec/ext/jfed-ssh-keys/1"
Full example:
<?xml version="1.0" encoding="UTF-8" standalone="yes"?>
<rspec type="request"
       xsi:schemaLocation="http://www.geni.net/resources/rspec/3 http://www.geni.net/resources/rspec/3/request.xsd"
       xmlns="http://www.geni.net/resources/rspec/3"
       xmlns:jFed="http://jfed.iminds.be/rspec/ext/jfed/1"
       xmlns:jfed-ssh-keys="http://jfed.iminds.be/rspec/ext/jfed-ssh-keys/1"
       xmlns:xsi="http://www.w3.org/2001/XMLSchema-instance">

   <node client_id="node0" component_manager_id="example.com+authority+cm" exclusive="true">
      <sliver_type name="raw-pc"/>
   </node>

   <jfed-ssh-keys:user-ssh-keys user="urn:publicid:IDN+example.com+user+foo">
      <jfed-ssh-keys:sshkey>ssh-rsa AAAAB....  foo@laptop</jfed-ssh-keys:sshkey>
   </jfed-ssh-keys:user-ssh-keys>
</rspec>
--share-slice- This options allows sharing the created or existing slice with other users. It expects a list of users, seperated by commas. Users can be specified by either the user URN, or by the short username. You can also specify the special value “PROJECTUSERS”, which will automatically share the slice with all users in the project. This is nice to use together with the
shareduserallkeysoption of--ssh-keys(which is set by default). --manifest <file>The file in which to store the manifest RSpec received when creating the sliver(s). This manifest typically contains details such as hostnames and SSH login details.
By default, the manifest is saved in
manifest-<SLICENAME>.rspec--nowait- By default, the experimenter CLI will wait until the slivers are ready before stopping. If this option is specified, it will not wait, bu exit once the slivers have started initialising. (The manifest is saved in both cases).
--call-log <filename>- This will store detailed information about all calls to a specified file. It is an XML based format.
--slice-recover-info <filename>- A file into which slice recover info will be stored. This can be used by the jFed GUI (if copied to the correct directory). (This functionality is not needed anymore if combining the latest CLI and GUI versions)
--stitching- If the RSpec requires stitching, allow it. By default, RSpecs that require stitching cause an abort
--rewrite-rspec- Parse the provided RSpec, and reconstruct it again, before sending it to the server. This can help prevent some server sides bug caused by valid but atypical RSpecs.
--bind-rspec <component manager URN>- Set the component_manager_urn for all “unbound” nodes in the provided request RSpec to the specified component manager. This option is allows using RSpecs that are not bound to a specific AM.
--output-format- The output format for the user info. Options are
textandjson. The default isjson. --action- and
--target-sliver- The options for the
poacommand. --delete-on-create-failure- If there is a failure in a call made to create the sliver(s), delete all resources everywhere before exiting.
--delete-on-become-ready-failure- If there is a failure in a call while waiting for the sliver(s) to become ready, delete all resources everywhere before exiting.
An example:
java -jar experimenter-cli.jar create -s slice1 -S myproject --create-slice -p mypem.pem -P mypass --rspec 1node.rspec --expiration-hours 1
Here, the user identified by mypem.pem create the slice slice1 in project myproject, with a slice expiration of 1 hour (the server might use a longer slice expiration than requested). Then, a sliver is made, containing the node specified in 1node.rspec. The CLI will wait until this sliver is reay, and will save the manifest RSpec in the file manifest-slice1.rspec.
To delete the created sliver you would use the command:
java -jar experimenter-cli.jar create -s slice1 -S myproject -p mypem.pem -P mypass --rspec 1node.rspec
To fetch user info (from the user in mypem.pem), you would use this command:
java -jar experimenter-cli.jar userinfo -p mypem.pem -P mypass
To reload a node, you would use this command:
java -jar experimenter-cli.jar poa --action restart --target-sliver urn:publicid:IDN+wall2.ilabt.iminds.be+sliver+73775 -p mypem.pem -P mypass -s slice1 -S myproject
- To create a slice (and get text info instead of JSON info), you would use this command::
- java -jar experimenter-cli.jar createslice –output-format text -p mypem.pem -P mypass -s slice1 -S myproject
- To request slice info (in JSON format), you would use this command::
- java -jar experimenter-cli.jar slice-info -p mypem.pem -P mypass -s slice1 -S myproject
Ansible support
There are a number of options which interact with ansible.
The main option is used to write the ansible config files for the experiment:
--ansible-dir <dir>- This option is available for the
createandmanifestcommand. It writes ansible config files to the specified directory. The dir will be created if it doesn’t exist. If it does exist, any existing files will be overwritten. The ansible files can be used with ansible commands, or with ansible playbooks. These can be used to create scripts that execute commands on different nodes. Important: In most cases (but not all), your private key will be copied to the created ansible dir. You should take the security considerations of this into account.
Next to ansible config files, Fabric files and ssh config files are also created. The ssh config file enables easy access to the nodes, even when an SSH proxy needs to be used. SCP access is also a lot easier using this file. An example:
~ $ cd ansible-files/
~/ansible-files/$ ansible all -m ping
~/ansible-files/$ ssh -F ssh-config node0
~/ansible-files/$ scp -F ssh-config /work/file.tgz node0:/tmp/
A number of optinos is available to automatically execute ansible playbooks with the CLI:
--ansible-add-playbook <source [output_file]>   Add an ansible playbook to execute. The argument specifies the source, and optionally (after a space) the target (this option can be specified
                                                multiple times)
--ansible-allow-any-playbook-outputfile         Allow any local file as execute_ansible_playbook output_file. (default: only use the basename of the specified output_file, and use the
                                                --ansible-dir as directory)
--ansible-allow-playbook-inputfile              Allow local files in execute_ansible_playbook source. (default: only allow URLs as source)
--ansible-debug                                 Set debug flags when calling ansible playbook.
--ansible-execute-rspec-playbooks               Execute all ansible playbooks found within request Rspec execute_ansible_playbook elements. (default: ignore them)
--ansible-playbook-exe <arg>                    Executable for the ansible playbook. Default is "ansible-playbook" and is usually fine. On some systems might need to be "/usr/bin/python2
                                                /usr/bin/ansible-playbook"
As can be seen, ansible playbooks can either be specified on the command line, using the –ansible-add-playbook option, or they can be specified inside the request RSpec file. In the last case, the playbook{s} in the RSpec are only executed if the –ansible-execute-rspec-playbooks options is specified. To specify playbooks in the RSpec, add the following directly under the rspec element (so not in a node or link):
<jFed:execute_ansible_playbook xmlns:jFed="http://jfed.iminds.be/rspec/ext/jfed/1" source="https://example.com/playbook.yml" output_file="output.txt"/>
The output file will be stored in the dir specified by –ansible-dir, unless the output file is a full path and the –ansible-allow-any-playbook-outputfile options is specified. The source must be an URL, unless –ansible-allow-playbook-inputfile is specified, in which case it is also allowed to be the path to a local file.
–ansible-playbook-exe can be used to change the ansible command. Note that it allows spaces, so it can also be used to pass additional arguments to the ansible executable.
Speaksfor credential support
Speaksfor credentials enable tools to execute calls on behalf of users, without having access to the user’s private key or password. Speaksfor credentials are typically generated by a webpage on the user’s authority, and passed to the tool. (The jFed probe can also generate speaksfor credentials, but that is not a typical use case.) The tool then includes these credentials in all calls to the AMs. If the provided speaksfor credential is valid, the AMs will execute the requested call on behalf of the user, instead of on behalf of the tool (and thus use the access rights of the user, not those of the tool). In the AM logs, it is visible everywhere that the tool speaks for the user. Note that speaksfor credentials have a limited validity, so tools cannot speak on hehalf of the user forever.
Some servers support “chainded” speaksfor. In this scenario, multiple speaksfor credentials are provided. For example, if valid speaksfor credentials are privided to allow tool A to speaks for tool B, and tool B to speaks for user C. Then, the AM will allow tool A to speak for user C.
The following command line option is used for speaksfor support:
--speaks-for <credential filename>- Include a speaksFor certificate in all calls, enabling you to make calls on behalf of another user.
This option can be specified multiple times, and/or the provided file may contain multiple speaksfor credentials. In these cases, multiple speaksfor credential are sent to the AM. The experimenter CLI will check scenarios with multiple speaksfor credentials, if the list of credentials forms no valid chain, it will fail before making any AM calls.
Command Line Help
If you do not enter any argument, the general syntax and the list of available commands will be returned. If you add a command as argument, but nothing else, specific help for the command will be returned.
Help for the create command:
user@laptop ~/Downloads/jfed_cli $ java -jar experimenter-cli.jar create
Command line argument Syntax error: Missing required options: s, r
usage: jfed-experimenter-cli <command> [command_options ... ]
Available commands: create,delete,status,renew,userinfo,sliceinfo,createslice
create options:
    --abort-if-slivers-exist                      Do not create any slivers if any sliver already exists on any of the authorities.
 -am,--am-api <AM API VERSION>                    The AM Api version to use ("2" and "3" supported, default: choose automatically)
    --ansible-dir <DIR>                           The dir in which to save ansible config files. Will be created if it doesn't exist. Will overwrite any existing files.
    --authorities-file <AUTHORITIES XML FILE>     The xml file containing the list of known authorities. Default: choose automatically
    --bind-rspec <COMPONENT MANAGER URN>          Bind any unbound nodes in the RSpec to a specified authority. This leaves bound nodes as they are. (this imples --rewrite-rspec)
 -c,--context-file <CONTEXT PROPERTIES FILE>      The properties file containing context details (only the login info in the context file is used by this tool)
    --call-log <FILE>                             A file into which all call details will be stored
    --clearinghouse                               Fetch certificates etc from geni clearinghouse first
    --create-slice                                Create the slice if it doesn't exist. (if it exists, this option is ignored)
 -d,--debug                                       extra debugging output
    --delete-on-become-ready-failure              If there is a failure in a call while waiting for the sliver(s) to become ready, delete all resources everywhere before exiting.
    --delete-on-create-failure                    If there is a failure in a call made to create the sliver(s), delete all resources everywhere before exiting.
 -e,--expiration-hours <INTEGER>                  The number of hours after which this slice expires. This is an optional argument. default: 2 hours in the future
    --expiration-date <RFC3339 DATE>              The date and time at which this slice expires. In RFC3339 format. This is an optional argument. default: 2 hours in the future
    --fake                                        Do everything, expect actually making the slice and sliver calls. Useful for debugging syntax. (will make calls relating to retrieving user data)
    --fake-sliver                                 Do everything, expect actually making the sliver calls. (will make calls relating to retrieving user data and creating or retrieving slice)
 -k,--ssh-keys <OPTION LIST>                      Specify which ssh keys to add. The argument is a (comma separated) list of options.
                                                  Available options: usercert,userkeys,rspec,shareduserallkeys
                                                  usercert: add the user making the calls, with the ssh key from the certificate in the login PEM file.
                                                  userkeys: add the user making the calls, with the ssh keys that are stored on the user authority MA server. (usercert and userkeys can be combined to
                                                  add all keys)
                                                  shareduserallkeys: add the ssh keys that are stored on the user authority MA server for the users the slice is shared with AND the ssh keys from that
                                                  user's login certificate.
                                                  rspec: add the users and keys specified in the RSpec itself.
                                                  This option is optional, default: usercert,rspec,shareduserallkeys
 -l,--logging                                     activate logback logging output
    --manifest <FILE>                             The file in which the manifest must be stored. (default: manifest-<SLICENAME>.rspec)
    --nowait                                      Do not wait until sliver is ready (default: wait until ready)
 -P,--private-key-password <CLEARTEXT PASSWORD>   The password of the private key. Only used if private key is password protected. Default: interactively ask password when needed.
 -p,--cert-and-key-file <PEM FILE>                The file containing the user certificate and private key (both in PEM format)
    --print-calls                                 Print all calls to stdout
 -q,--quiet                                       less output
 -r,--rspec <RSPEC XML FILE>                      The rspec file to use for creating a sliver
    --rewrite-rspec                               Parse the provided RSpec, and reconstruct it again, before sending it to the server. This can help prevent some server sides bug caused by valid but
                                                  atypical RSpecs.
 -S,--project-name <PROJECT NAME>                 The name of the project (= sub authority) of the slice. This is an optional argument (however some authorities might require a project!). You can also
                                                  use "CHOOSE_AUTOMATICALLY" as project name, in that case, the last (determined by your SA) project you are a member of will be used.
 -s,--slice <SLICE URN OR NAME>                   The URN or name of the slice to use. (auto detected)
    --share-slice <USERNAME(S)>                   List of users to share slice with. Either use the URN of each user, or the short username. You can also specify the special value "PROJECTUSERS",
                                                  which will automatically share the slice with all users in the project. Multiple users can be specified by separating them with a comma.
    --slice-recover-info <FILE>                   A file into which slice recover info will be stored. This can be used by the jFed GUI (if copied to the correct directory).
    --speaks-for <CERTIFICATE FILENAME>           The speaksFor certificate (in a file), enabling you make calls on behalf of another user.
    --stitching                                   If the RSpec requires stitching, allow it. By default, RSpecs that require stitching cause an abort
 -v,--version                                     show version and exit

Template Context Properties File:
username = <username>
passwordFilename = <filename of file containing password>
pemKeyAndCertFilename = <filename of file containing user certificate and private key in PEM format>
userAuthorityUrn = <URN of test user's authority>
Help for the delete command:
Command line argument Syntax error: Missing required option: s
usage: jfed-experimenter-cli <command> [command_options ... ]
Available commands: create,delete,status,renew,userinfo,sliceinfo,createslice
delete options:
 -am,--am-api <AM API VERSION>                    The AM Api version to use ("2" and "3" supported, default: choose automatically)
    --authorities-file <AUTHORITIES XML FILE>     The xml file containing the list of known authorities. Default: choose automatically
 -c,--context-file <CONTEXT PROPERTIES FILE>      The properties file containing context details (only the login info in the context file is used by this tool)
    --call-log <FILE>                             A file into which all call details will be stored
    --clearinghouse                               Fetch certificates etc from geni clearinghouse first
 -d,--debug                                       extra debugging output
    --fake                                        Do everything, expect actually making the slice and sliver calls. Useful for debugging syntax. (will make calls relating to retrieving user data)
    --fake-sliver                                 Do everything, expect actually making the sliver calls. (will make calls relating to retrieving user data and creating or retrieving slice)
 -l,--logging                                     activate logback logging output
 -p,--cert-and-key-file <PEM FILE>                The file containing the user certificate and private key (both in PEM format)
 -P,--private-key-password <CLEARTEXT PASSWORD>   The password of the private key. Only used if private key is password protected. Default: interactively ask password when needed.
    --print-calls                                 Print all calls to stdout
 -q,--quiet                                       less output
 -r,--rspec <RSPEC XML FILE>                      The rspec file to get the needed information from (not mandatory for delete, but might not work without)
 -s,--slice <SLICE URN OR NAME>                   The URN or name of the slice to use. (auto detected)
 -S,--project-name <PROJECT NAME>                 The name of the project (= sub authority) of the slice. This is an optional argument (however some authorities might require a project!). You can also
                                                  use "CHOOSE_AUTOMATICALLY" as project name, in that case, the last (determined by your SA) project you are a member of will be used.
    --speaks-for <CERTIFICATE FILENAME>           The speaksFor certificate (in a file), enabling you make calls on behalf of another user.
 -v,--version                                     show version and exit

Template Context Properties File:
username = <username>
passwordFilename = <filename of file containing password>
pemKeyAndCertFilename = <filename of file containing user certificate and private key in PEM format>
userAuthorityUrn = <URN of test user's authority>
Example speaks-for usage
You can use jFed CLI in speaks-as or speaks-for mode. Speaks-as is the typical way of using it where the user feeds its pem file (public signed certificate and private key) to jFed CLI and jFed CLI speaks ‘as’ that user. Things become more difficult if you want to run a service which uses jFed CLI to provision resources on a testbed. Of course, you can create a specific account and use that one for the service. So, all users using the service will have their resources created under the service account. As such, from testbed viewpoint, the service account is responsible for what happens with the nodes, and if quota are considered, the service account needs enough quota.
A second possibility is that users upload their private key to the serivce and the serivce uses that key to provision resources. This is not really nice from a security viewpoint.
The third possibility is that the service speaks-for the user. In that way, the service has its own certificate and private key, but the users give permission to the service to speak in their name (so the user trusts the service) without giving their private key ! They can also limit in time the duration for which the service can speak in their name, so to prevent abuse e.g.
Automatic link sharing
Emulab based testbeds allow users to share physical links between experiments/slice. Normally, a link has to be shared once the experiment is up.
The jFed CLI offers a convenient way to set up this link sharing automaticall when creating an experiment.
The following element has to be added to the link to be shared in the RSpec:
<jfed:auto_share_lan name=”exampleSharedLan”/>
If the CLI create command is used to create an experiment containing a link with this element, the CLI will automatically share the link once all nodes and links are ready.
Experimenter CLI 2
Version 2 of the experimenter CLI replaces the version 1. To avoid any confusion, version 2 of the CLI will always be called experimenter cli 2. Version 2 is not completely backward compatible, but most command line options of version 1 are recognized, which should make converting not too hard.
Note that the recommended way of using version 2 is using “action files” (see below). The command line options are mostly intended for backward compatibility with version 1.
Almost all of the new functionality of version 2 can only be used in “action files”, and has no matching command line option.
You can use the --print-action option of version 2 in combinatio nwith the command line arguments of version 1, to generate an “action file”.
Overview
The jFed experimenter CLI version 2 is used to create experiments easily from the command line, and to request some useful info about users and slices.
The tool has a mandatory --action <action|file> argument.
The argument can either specify a file (which contains the action!), or specify an action.
Extra configuration of the action can be specified in the file (if the action is specified using a file), or using command line arguments. If both are present, the command line arguments will overwrite the configuration in the file.
The supported actions are:
run- Create and run an experiment. This can use a number of RSpec/ESpec sources, and creates a new slice. Ansible playbooks can be executed after the experiment is ready (ESpecs can also execute ansible playbooks, in seperate earlier step).
delete- Delete the specified slivers.
status- Get the status of the specified slice.
manifest- Locally store the manifest RSpec of the specified slice (use
--manifestto override the default location). This can also be used to generate ansible config files, using the--ansible-diroption, and to execute ansible playbooks. renew- Renew the expiration time of the slivers
userinfo- Fetch user info: urn, slices and projects
This command requires minimum version
develop 172of the jFed CLI poaorperformOperationalAction- PerformOperationalAction. On emulab based testbeds this can be used to reload or restart nodes, and to get a console URL.
sliceaction- Perform an action on an already running experiment. Supported actions: Run a Connectivity Test, Run a Link Test, (Re-)Run an ESpec (ony the upload, execute and ansible parts)
createslice- Create a slice, but allocate no resources (= create no slivers)
sliceinfo- Retrieve slice info. This also tries to retrieve a list of all slivers. It does not query the sliver status. (use
statusfor that). sliceCredential- To be implemented: fetch the slice manifest and store it
decrypt- To be implemented: decrypt the user login PEM file and store it
Each of these command requires different info. You can get help, including an example for each command easily:
user@laptop ~/Downloads $ java -jar experimenter-cli2.jar --action poa --help
usage: experimenter-cli --action performOperationalAction
 -c,--context-file <FILE>          Specify the "context" file. This old format
                                   contains info about the actual login
                                   file(s).It is advised to use the -p option
                                   instead of this one.
 -C,--cert-file <FILE>             Specify the file containing the "login" X509
                                   certificate, in PEM format
    --call-log <FILE>              A file into which all call details will be
                                   stored
 -d,--debug                        extra debugging output
 -h,--help                         show help and exit
 -k,--key-file <arg>               alias for --cert-and-key-file   (Only present
                                   for backward compatibility. Might be removed
                                   in future versions)
    --manifest <FILE>              The file in which the manifest must be
                                   stored. (default: manifest-<SLICENAME>.rspec)
 -p,--cert-and-key-file <FILE>     The file containing the user certificate and
                                   private key (both in PEM format)
 -P,--privkey-pass <PASSWORD>      The password of the private key. Only used if
                                   private key is password protected. Default:
                                   interactively ask password when needed.
 -pa,--print-action                Take no action, but instead output the action
                                   file matching the current instructions (which
                                   are made up out of cli argument and/or the
                                   content of the action file)
 -poa,--poa-action <ACTION>        The operational action to perform. (Options:
                                   ReloadOS, Restart, ConsoleUrl)
    --print-calls                  Print all calls to stdout
 -q,--quiet                        less output
 -s,--slice <SLICE URN/NAME>       The URN or name of the slice to use. (auto
                                   detected)
 -S,--project-name <NAME>          The name of the project (= sub authority) of
                                   the slice. This is an optional argument
                                   (however some authorities might require a
                                   project!). You can also use
                                   "CHOOSE_AUTOMATICALLY" as project name, in
                                   that case, the last (determined by your SA)
                                   project you are a member of will be used.
    --silent                       less output (same as --quiet)
 -t,--target-sliver <SLIVER URN>   The URN of the sliver to perform the action
                                   on.
 -v,--version                      show version and exit

Example yml for "performOperationalAction":
---
action: POA
poaAction: ConsoleUrl
slice:
  expireTimeMin: 120
  failIfNoProject: true
  failOnExistingSlice: false
  project: my_project_s_name
  projectSource: PROVIDED
  sliceName: my_slice_name
sliverUrn: urn:publicid:IDN+example.com+sliver+s15
user:
  password: my_pem_password
  passwordMethod: DIRECT
  pem:
  - user.pem
  speaksForCredential: []
Configuration
The CLI shares its configuration with the experimenter GUI. The easiest way to edit the configuration is using the experimenter GUI.
You can also edit the file ~/.jFed/experimenter-ssh.properties directly.
Typical settings to change are exogeni settings, and proxy settings.
Download and Run
Go to the jFed download page and download the jFed CLI package at the bottom of the page. You can also download a development version. Note that the top build on that page is the latest version. Click on the build of your choice, and on the next page, download the “jFed CLI (archive)”.
In both cases, you will download a file called jfed_cli.tar.gz. Extract this file to a directory and go to that directory.
Here you will see experimenter-cli2.jar and a lib dir. These are both required to run the Experimenter CLI.
Linux CLI example:
user@laptop ~/Downloads $ tar xfz jfed_cli.tar.gz
user@laptop ~/Downloads $ cd jfed_cli
user@laptop ~/Downloads/jfed_cli $ ls
automated-testing.jar  experimenter-cli.jar  probe-cli.jar experimenter-cli2.jar  lib
user@laptop ~/Downloads/jfed_cli $ java -jar experimenter-cli2.jar
Syntax: jfed-experimenter-cli [-a|--action <ACTION NAME | ACTION FILE>] [action_options ... ]
Available Actions: run,createSlice,performOperationalAction,renew,delete,userinfo,sliceinfo,sliceCredential,manifest,decrypt
Help for a specific command: jfed-experimenter-cli --action <ACTION NAME> --help
On a headless server, you might need to use a fake display. (We’re looking into removing the requirement for a display for a CLI. It’s required at the moment, even though it’s not used at all.)
In the meantime, as a workaround, you can install Xvfb and run these commands before starting the CLI:
/usr/bin/Xvfb :99 &
export DISPLAY=":99"
Usage
The tool is a java jar, so you need to use java to run it.
The advised method to use the tool, is to create an “action file” (in yaml format) and pass that to the action argument of the tool. This provides the full range of options the CLI has to offer. Alternatively, you can provide some of the options using command line arguments (for the most part the same as for version 1 of the cli).
The easiest way to create an action file, is to use the builtin “wizard”. Start it like this:
user@laptop ~/Downloads/jfed_cli $ java -jar experimenter-cli2.jar --wizard
Welcome to the jFed CLI Wizard. This tool guide you through all the available actions and options.
This will only create the YaML config for the action, it will not execute the action.
At the end, it will be shown how the created action can be executed.

Available actions:

0) run
1) createSlice
2) performOperationalAction
...
Another way to get info on both the “action yml” format, and the command line optinos, is to request help for the specific action, for example:
user@laptop ~/Downloads/jfed_cli $ java -jar experimenter-cli2.jar --action sliceinfo --help
usage: experimenter-cli --action sliceinfo
 -c,--context-file <FILE>        Specify the "context" file. This old format contains info about the actual login file(s).It is advised to use the -p option instead of this one.
 -C,--cert-file <FILE>           Specify the file containing the "login" X509 certificate, in PEM format
    --call-log <FILE>            A file into which all call details will be stored
 -d,--debug                      extra debugging output
 -h,--help                       show help and exit
 -k,--key-file <arg>             alias for --cert-and-key-file   (Only present for backward compatibility. Might be removed in future versions)
    --manifest <FILE>            The file in which the manifest must be stored. (default: manifest-<SLICENAME>.rspec)
    --output-format <FORMAT>     The output format to use (for user information). Choices: "text" or "json". Default:json
 -p,--cert-and-key-file <FILE>   The file containing the user certificate and private key (both in PEM format)
 -P,--privkey-pass <PASSWORD>    The password of the private key. Only used if private key is password protected. Default: interactively ask password when needed.
 -pa,--print-action              Take no action, but instead output the action file matching the current instructions (which are made up out of cli argument and/or the content of the action file)
    --print-calls                Print all calls to stdout
 -q,--quiet                      less output
 -s,--slice <SLICE URN/NAME>     The URN or name of the slice to use. (auto detected)
 -S,--project-name <NAME>        The name of the project (= sub authority) of the slice. This is an optional argument (however some authorities might require a project!). You can also use "CHOOSE_AUTOMATICALLY" as project name, in that
                                 case, the last (determined by your SA) project you are a member of will be used.
    --silent                     less output (same as --quiet)
 -v,--version                    show version and exit

Example yml for "sliceinfo":
---
action: SLICEINFO
showMetaInfo: true
showStatus: true
showUsers: true
slice:
  expireTimeMin: 120
  failIfNoProject: true
  failOnExistingSlice: false
  project: my_project_s_name
  projectSource: PROVIDED
  sliceName: my_slice_name
user:
  password: my_pem_password
  passwordMethod: DIRECT
  pem:
  - user.pem
  speaksForCredential: []
The recommended usage is to create an action file, and pass only that file and the user info on the command line. For example, create this file called run_experiment.yml:
action: RUN
experiment:
  requestRSpec:
    source: PROVIDE_CONTENT
    providedContentSource: |
      <rspec xmlns="http://www.geni.net/resources/rspec/3" type="request">
        <node client_id="node0" exclusive="false" component_manager_id="urn:publicid:IDN+docker.ilabt.imec.be+authority+am">
          <sliver_type name="docker-container"/>
        </node>
      </rspec>
  runLinkTest: true
  slice:
   sliceName: exp1
   failOnExistingSlice: false
   expireTimeMin: 120
   projectSource: PROVIDED
   project: myProject
  waitForReady:
    maxTimeMin: 5
shareWith:
  projectMembers: true
deleteOn:
  failCreate: true
  failBecomeReady: true
  failConnectivityTest: true
  failLinkTest: true
And run it with this command:
user@laptop ~/Downloads/jfed_cli $ java -jar experimenter-cli2.jar --action run_experiment.yml -p login.pem
This will create a slice names “exp1” in the project “myProject” with a single docker AM node, which expires in 2 hours. The slice will be shared with all members of the project “myProject”. The public SSH keys of these members will be added to the node. If the resources are not ready in 5 minutes or fails in another way, the slice will be deleted.
TODO: more examples will be added here
Experimenter CLI FAQ (version 1 and 2)
Recent ubuntu 22 example
When using ubuntu 22, you can install a correct java version with
apt install openjdk-19-jre-headless
For CLI2, you need also (to avoid Unable to open DISPLAY):
apt-get install xvfb
Example command line for CLI1 to start an experiment:
java -jar experimenter-cli.jar create -s brecht2 -S ComNetLab --create-slice -p cert_group17_nopass.pem --rspec imecwall1.rspec --expiration-hours 1 abort-if-slivers-exist --share-slice avanmael Assuming specified user "avanmael" is: urn:publicid:IDN+wall2.ilabt.iminds.be+user+avanmael
Exmple command line for CLI2 to start an experiment:
Xvfb :10 &
DISPLAY=:10 java -jar experimenter-cli2.jar --action run_experiment.yml -p cert_group17_nopass.pem
with run_experiment.yml:
action: RUN
experiment:
  requestRSpec:
    source: PROVIDE_CONTENT
    providedContentSource: |
         <?xml version='1.0'?>
         <rspec xmlns="http://www.geni.net/resources/rspec/3" type="request" generated_by="jFed RSpec Editor" generated="2023-11-25T12:01:23.908+01:00" xmlns:emulab="http://www.protogeni.net/resources/rspec/ext/emulab/1" xmlns:delay="http://www.protogeni.net/resources/rspec/ext/delay/1" xmlns:jfed-command="http://jfed.iminds.be/rspec/ext/jfed-command/1" xmlns:client="http://www.protogeni.net/resources/rspec/ext/client/1" xmlns:jfed-ssh-keys="http://jfed.iminds.be/rspec/ext/jfed-ssh-keys/1" xmlns:jfed="http://jfed.iminds.be/rspec/ext/jfed/1" xmlns:sharedvlan="http://www.protogeni.net/resources/rspec/ext/shared-vlan/1" xmlns:xsi="http://www.w3.org/2001/XMLSchema-instance" xsi:schemaLocation="http://www.geni.net/resources/rspec/3 http://www.geni.net/resources/rspec/3/request.xsd ">
            <node client_id="node0" exclusive="true" component_manager_id="urn:publicid:IDN+wall1.ilabt.imec.be+authority+cm">
              <sliver_type name="raw-pc"/>
              <location xmlns="http://jfed.iminds.be/rspec/ext/jfed/1" x="245.0" y="173.0"/>
            </node>
         </rspec>
  runLinkTest: true
  slice:
   sliceName: exp1
   failOnExistingSlice: false
   expireTimeMin: 120
   projectSource: PROVIDED
   project: ComNetLab
  waitForReady:
    maxTimeMin: 5
shareWith:
  projectMembers: false
deleteOn:
  failCreate: true
  failBecomeReady: true
  failConnectivityTest: true
  failLinkTest: true
When using legacy authority.ilabt.iminds.be certificates
To comply with the older server (e.g. if you receive the error Error retrieving user credential: No result), you need the following: edit /usr/lib/jvm/java-19-openjdk-amd64/conf/security/java.security:
remove TLS1 and TLS1.1 from this line
jdk.tls.disabledAlgorithms=SSLv3, RC4, DES, MD5withRSA, \
 DH keySize < 1024, EC keySize < 224, 3DES_EDE_CBC, anon, NULL
Depending on your location, you might also verify that you can reach www.wall2.ilabt.iminds.be. If not, you might add the following to /etc/hosts:
193.191.148.179 www.wall2.ilabt.iminds.be
Certificate passwords
It should be possible to give passwords on the command line, but it seems that recent versions of the CLI have some problems and report FATAL: Not in interactive mode, so password cannot be requested.. The solution is to remove the password from the pem file it seems:
openssl rsa -in cert_group17.pem -out cert_group17_nopass.pem
sed -ne '/-----BEGIN CERTIFICATE-----/,/-----END CERTIFICATE-----/p' < cert_group17.pem >> cert_group17_nopass.pem