jFed Experimenter GUI
Prerequisites
Windows
You need to install PuTTY.
You do not need to install java: it is bundled with the installer.
Linux
You need to install java 8 manually.
Mac
You do not need to install java: it is bundled with the installer.
But make sure that you start the jFed installer by downloading it, and then right-clicking and choosing ‘Open’.
Installation
To install the jFed experiment GUI, go to the jFed downloads page, and follow the instruction there.
Basic features: First experiment tutorial
Logging in
There a 2 basic methods to log into jFed.
You can login directly, using a button on the site that provided your account. jFed might will ask your account info (only on first login).
Or you can start jFed, open the certificate file you downloaded, provide your password and press the login button.
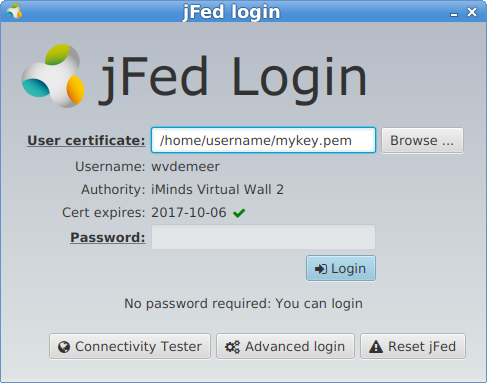
After you login for the first time, a dialog box will pop up to say that you have to configure jFed for this initial run. You do typically do not need to make any changes, but it might be good to check out some settings.
Check Windows Preferences

In this preferences settings you should point jFed to the PuTTY installation directory (see putty). You should see all green checkmarks. If not, then please install PuTTY from here: http://the.earth.li/~sgtatham/putty/latest/x86/putty-0.64-installer.exe.
Click on Use pageant to manage SSH keys to enable the PuTTY ssh agent which makes that you only once have to type the passphrase on your ssh key.
Click Save at the bottom right to save these settings.
Check Unix/Mac Preferences
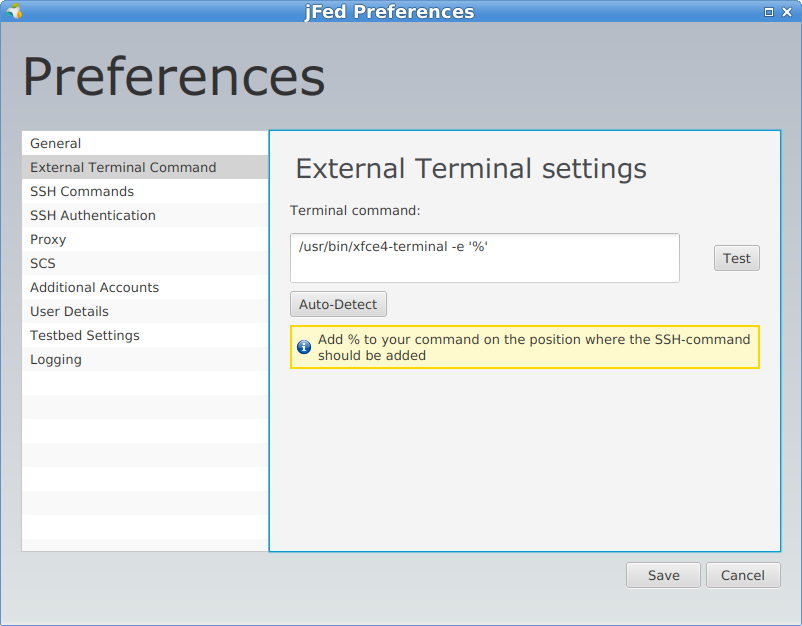
In this preferences settings, jFed should have a reasonable terminal configuration, so only change the default if it doesn’t work when logging in.
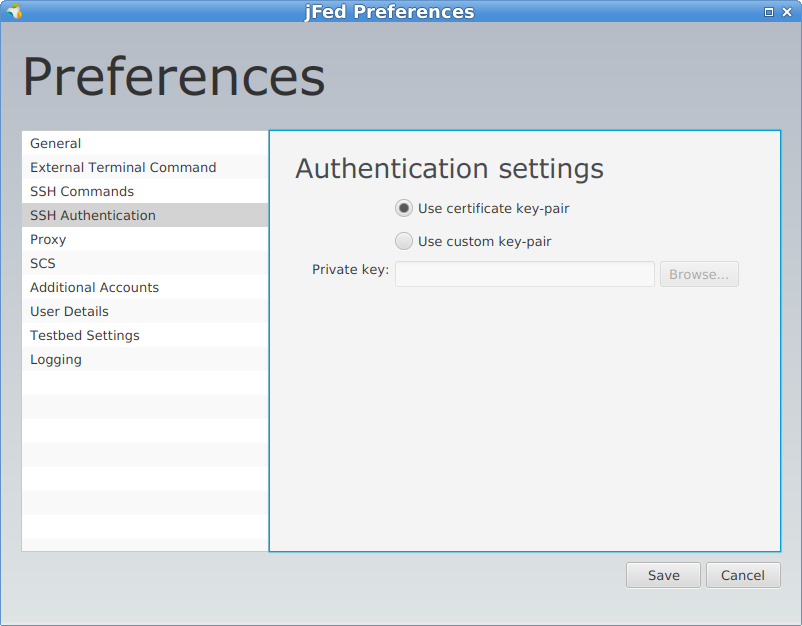
Secondly, you can click Use custom key-pair and point jFed to a private and public SSH key you have saved on your PC.
Click Save at the bottom right to save these settings.
Create your first experiment
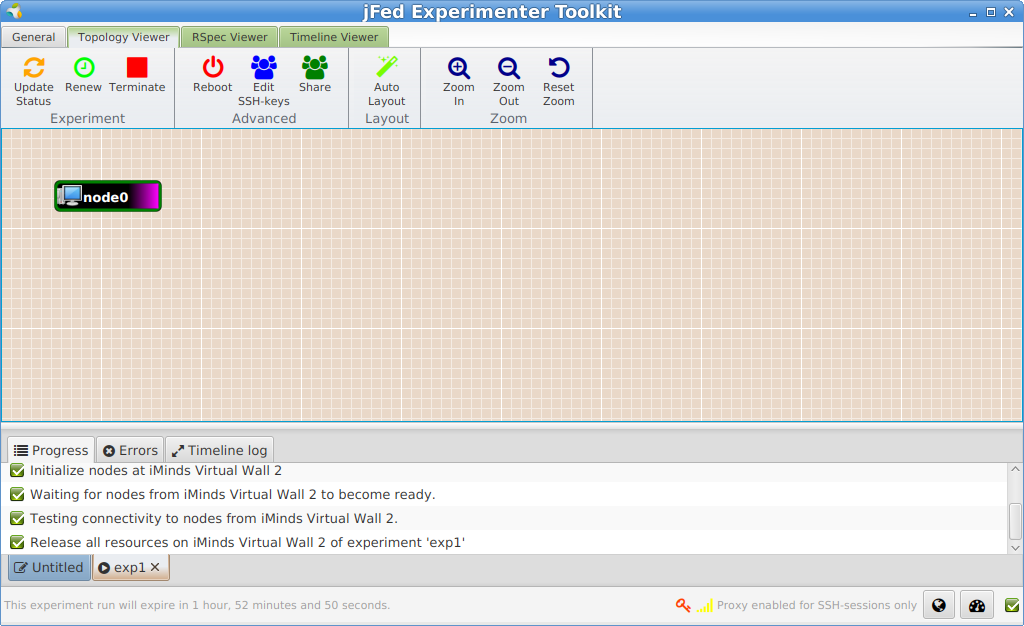
When you have logged in, and checked your preferences, you see jFed with no experiments loaded.
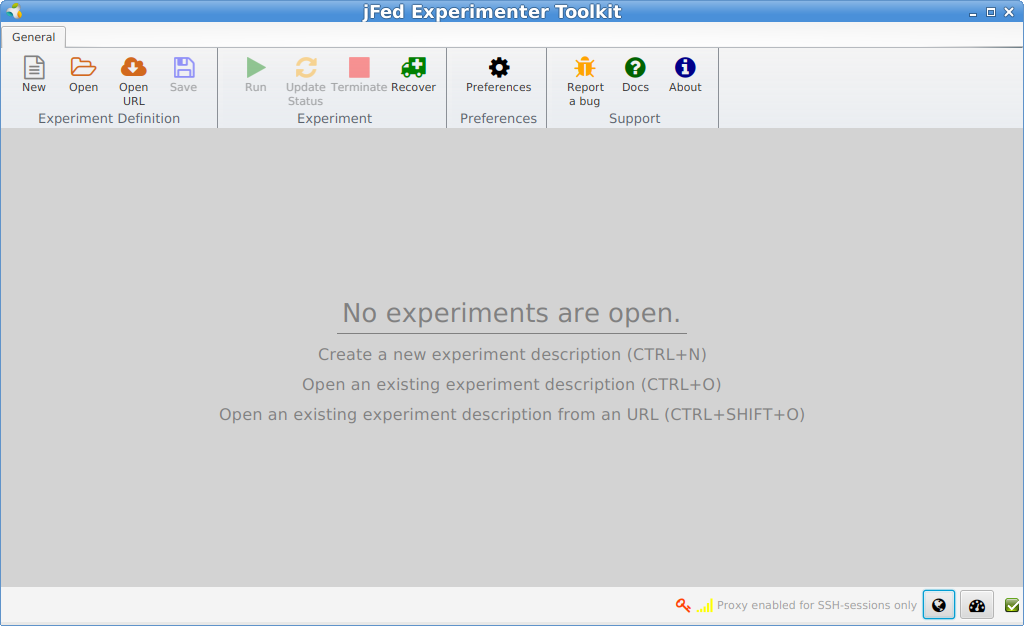
When you click New, you get a blank canvas where you can draw your experiment. Let’s drag in a Generic node from the left side to the canvas.
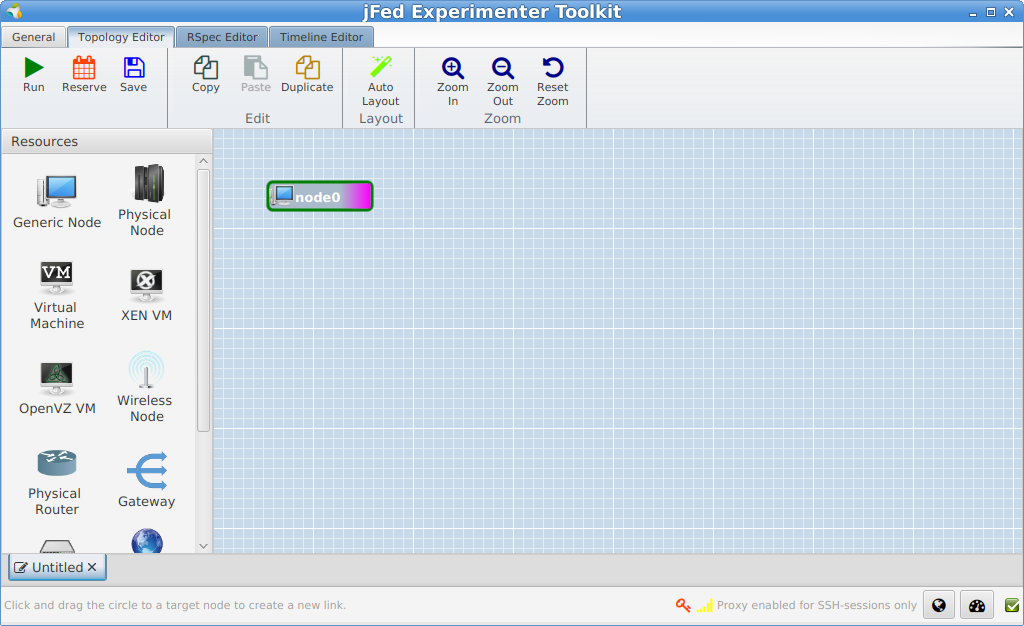
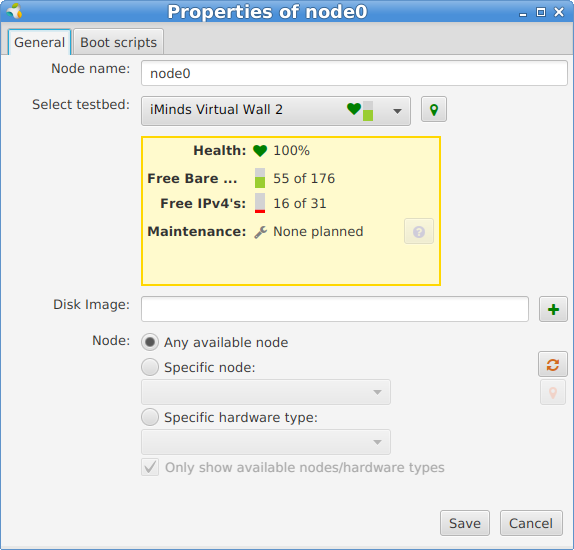
For more specific experiments you can right click and configure the node, but for now let it in the default settings.
Run the experiment
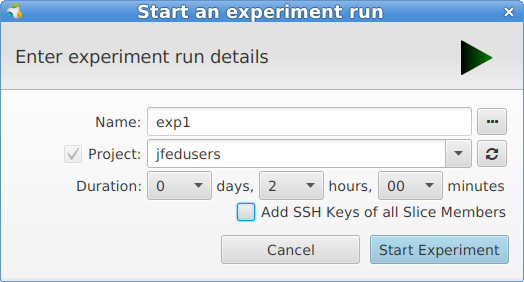
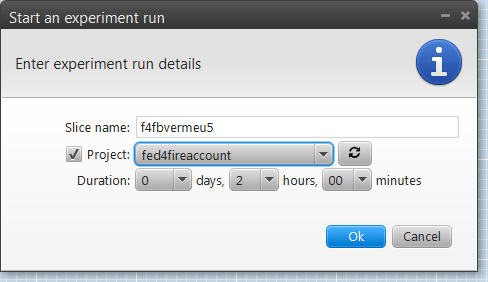
Let’s run this experiment, by clicking the tab General at the top, and then the Run button. We will now have to choose a name for the experiment (= slice name) and choose a maximum duration.
It will now take a couple of minutes to get the node prepared
Login on a node of the experiment
When the node becomes green, we can right click on the node, and click Open SSH terminal.
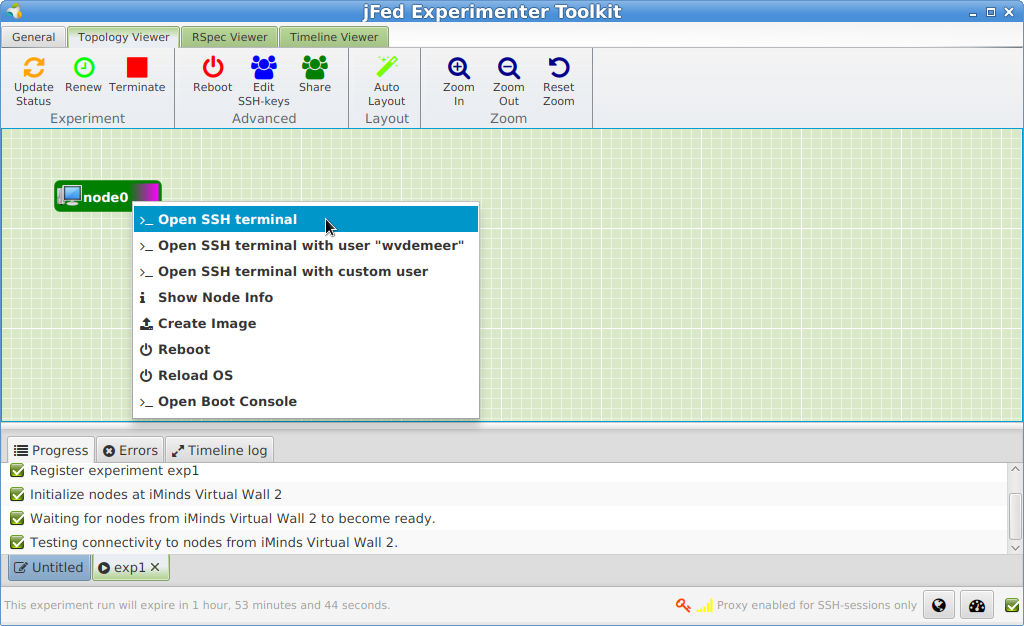
And then you should be automatically logged in. If the node says Key refused or another error it means something has gone wrong. See Note on connectivity.
Ending the experiment
To release your resources before the end time of your experiment, you can click the Terminate button at the top in jFed.
After that the nodes will become black and if your ssh connection is still open, you can see that the node will be shutdown.
Note on connectivity
As in Europe public IPv4 addresses are scarce, we have the following problems for getting connected to the nodes:
- testbeds as Virtual Wall or w-iLab.t are only accessible through IPv6
- testbeds as BonFIRE have only a limited number of public IPv4 addresses, which is minimal in relation to the number of virtual machines they run.
- other testbeds run only on private IPv4 address and should be accessed through a gateway node.
We are currently working around this in several ways, but for this first testrun now:
- the default node that was selected is at the Virtual Wall testbed (which is only accessible through IPv6).
- if you have IPv6 all will be okay and you will be able to login on the node.
- if you don’t have IPv6, then you can go to jFed preferences. Click
Run Proxy Testat the bottom right, And then clickAlwaysbesidesProxy for SSH connectionsfollowed bySave. You can now right click the node to login through SSH and you will be proxied through an IPv4 server. - if you don’t have IPv6, you can register for an IPv6 address and tunnel, e.g. at Sixxs (choose AYIYA tunnel) and install Aiccu.
- instead of a Generic node, you can draw a Virtual Machine on your canvas, and you can choose a Planetlab Europe node or a BonFIRE Virtual Machine with a public IPv4 address. for BonFIRE, you need an additional account (see bonfire).
Test connectivity
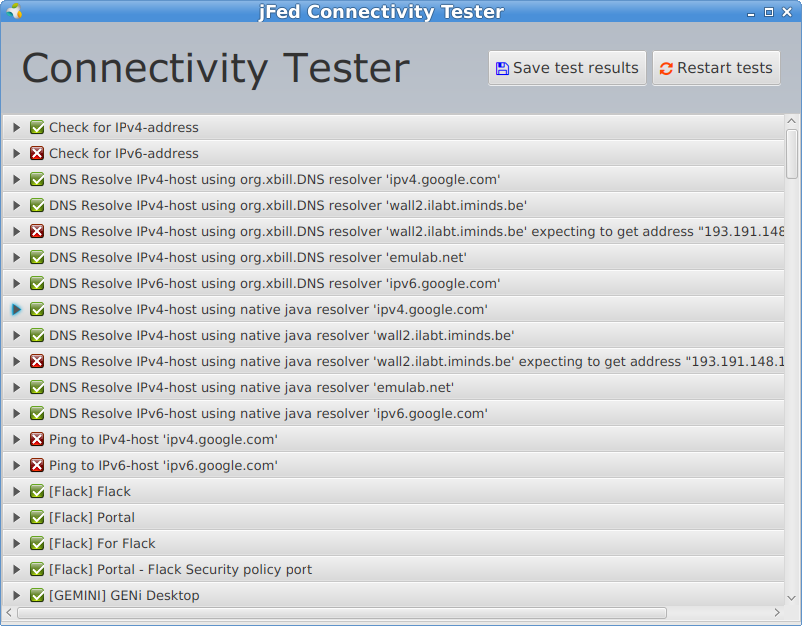
You can test your connectivity with jFed by clicking the small globe button on the bottom.
And you will see a connectivity report:
Bug report with jFed
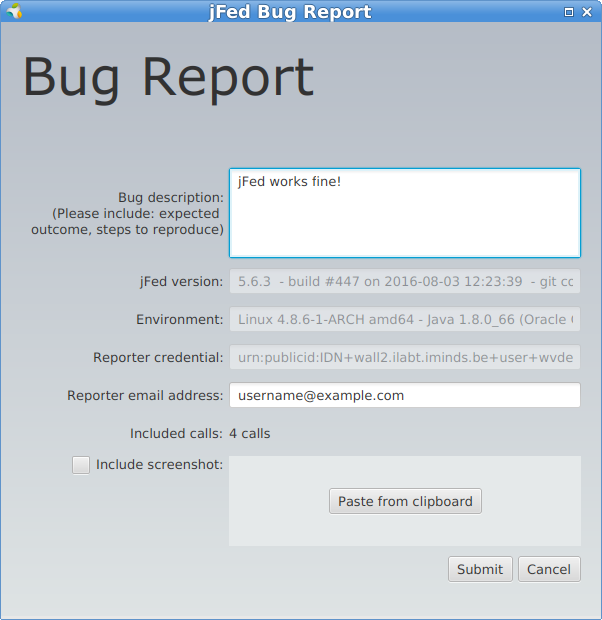
In case you cannot get a green node on your canvas (e.g. at the bottom of jFed you see problems passing by), click the Report a bug button in jFed and fill in a bug report. This will send all relevant information on calls and connectivity to jFed staff, so they can investigate the problem and report back to you.
The reporter email address is standard filled in with your certificate email address and this is forwarded by the authority to your own email address, so you don’t have to change this.
Advanced features
Introduction
This section will show you some advanced features of the jFed Experimenter GUI.
Proxy settings
One of the advanced features of jFed is the support of an SSH proxy for the following three problems:
- the APIs of testbeds typically use a lot of exotic TCP ports (12369, 12345, 3636, …). These ports are sometimes blocked by firewalls.
- some testbeds (e.g. Virtual Wall and w-iLab.t) expose the nodes only through IPv6 (because of shortage of public IPv4 addresses). If you are only on an IPv4 network, you cannot reach those nodes without an IPv6 tunnel.
- some nodes (e.g. Virtual Wall windows 7 images, Virtual Wall OpenVZ containers) might have only a private IPv4 address and be accessible only through a gateway (with a public IP address).
For all these cases, jFed has now SSH proxy support which can be enabled for the API calls or/and SSH connections.
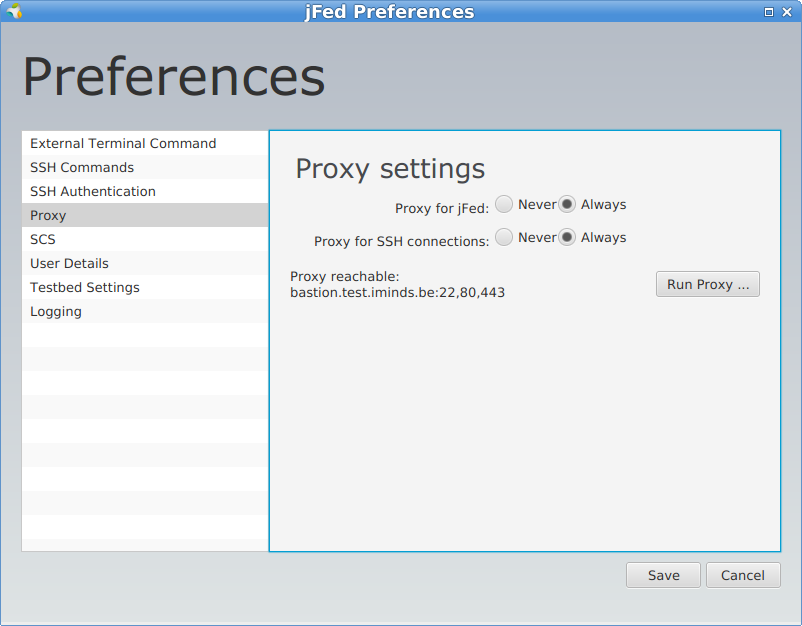
This can be enabled by going to the “General” tab, clicking “Preferences” and going to the “Proxy” settings.
The settings are labeled respectively Use Proxy for jFed and Proxy for SSH connections in the screenshot below.
Before you can tick Always you should click first Run Proxy Test.
If you cannot reach the proxy server, it makes no sense to use the proxy.
On windows, it is good to combine this with using the PuTTY SSH agent, this can also be set in the preferences.
Recover slices
If you have set up an experiment/slice, and you have terminated jFed, you can click the Recover button to fetch the information of old slices.
In this way you can again see the topology and login on the nodes if they are still up and running.
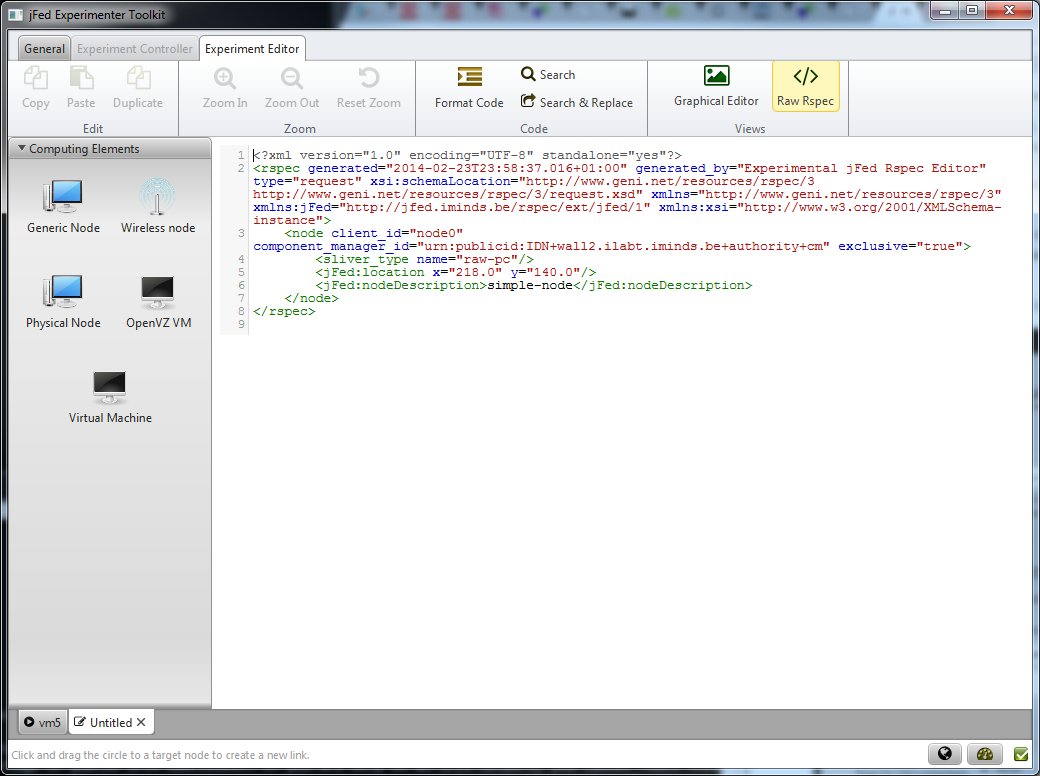
RSpec editor
It is now possible to toggle between a graphical editor and a raw RSpec editor, which makes it possible to add extra information or to put in new RSpecs.
With the Format Code button you can optimise the XML view on the RSpec. With Search or Search & Replace you can enhance your edit. E.g. if you change all component_manager_id`s from
wall2.ilabt.iminds.be to emulab.net, your same experiment will run in Utah Emulab.
Openflow support
As we have now a raw RSpec editor, it has become possible to support RSpecs which are difficult to view graphically, e.g. openflow.
If you Open URL and fill in http://jfed.iminds.be/openflow.rspec, an openflow RSpec is loaded for the Virtual Wall openflow testbed and you can further edit it.
jFed supports sending the RSpec to the right Aggregate Manager.
See also http://fed4fire-testbeds.ilabt.iminds.be/ilabt-documentation/openflow.html.
Virtual wall advanced features
You can find the specific Virtual Wall advanced RSpecs at Virtual Wall RSpecs which make it possible to load other images, Windows 7, impairment on links, install software, and so on.
Adding extra ssh-keys to nodes
By default jFed will add the ssh-key that you specify in preferences, and the public ssh key extracted from your pem certificate.
However if you want to specify extra ssh-keys (e.g. of other users, or from yourself but on another device), you can do so as follows, by adding the following information in the RSpec (just before the closing rspec tag e.g.):
<jfed-ssh-keys:user-ssh-keys user="urn:publicid:IDN+wall2.ilabt.iminds.be+user+wvdemeer">
  <jfed-ssh-keys:sshkey>ssh-rsa AAAAB....  wim@tzu</jfed-ssh-keys:sshkey>
</jfed-ssh-keys:user-ssh-keys>
You can repeat both the internal sshkey (this will add multiple ssh-keys to the specified user) or the external user-ssh-keys so
you can specify multiple users.
If you omit the user part, then the ssh-keys will be added to the default user who created the experiment. The user unique identifier (URN)
depends on the authority you use, but for users of the Virtual Wall 2 authority, this always starts with urn:publicid:IDN+wall2.ilabt.iminds.be+user+ followed by your login name.
Caveats:
this is a jFed specific extension to the RSpec (it is interpreted and added as argument in the AM calls), so specify in the rpec header (jFed itself does this already for new experiments, but not if you import an old RSpec):
xmlns:jfed-ssh-keys="http://jfed.iminds.be/rspec/ext/jfed-ssh-keys/1"
you need a jFed compile r1138 or newer (http://jfed.iminds.be/releases/r1338/ : click Experimenter GUI - Launch webstart)
Support for subauthorities
When starting an experiment, automatically a list of your subauthorities/projects is shown and you can select one. This information can be used at testbeds to attach policies or quota based policies.
Ansible support
jFed supports ansible in two ways: either run ansible playbooks on your local PC (requires linux/MAC), or add a node to your experiment and run ansible from that node.
Local ansible support
Generate ansible inventory file from running experiment
You can generate an ansible inventory file from any running experiment. To do this, open the “Rspec Viewer” ribbon. Then click the “Save Experiment” button and select “Export Configuration Management Settings”. You then need to choose a location to store a zip file. The generated zip file contains ansible.cfg and the ansible inventory file. Note that in some cases, this file might contain your private key! So it is not a good idea to share this file.
Automatically run local ansible
Prerequisites: This will only work when ansible is locally installed (on linux/mac).
It is also possible to make jFed execute ansible playbooks, using the local ansible install, when the experiment is ready. To do this, add the execute_ansible_playbook element to the rspec:
<rspec ...>
   ...
   <jFed:execute_ansible_playbook xmlns:jFed="http://jfed.iminds.be/rspec/ext/jfed/1" source="https://example.com/playbook.yml" output_file="output.txt"/>
</rspec>
The source can be the path to a local file as well.
Remote ansible: Ansible node
Prerequisites: This feature expects Ansible to be installed on one of the nodes in the experiment, which can be achieved by using an install-script, or by embedding it in a custom disk-image.
jFed supports the automatic execution of Ansible playbooks on the ansible node in your experiment. This feature is included in jFed v5.7 and higher. These playbooks are launched when your experiment starts. The output of the playbook can be inspected in an extra “Ansible”-tab that will appear during the execution.
Feature: Waiting for install-scripts to complete
Some testbeds (like Virtual Wall 1&2, and other emulab-testbeds) have support for the automatic execution of install-scripts once a node has been provisioned. However, there is no feedback on when these scripts have finished. To prevent race-conditions (eg. trying to execute the ansible playbook before ansible has been installed on the host machine), an extra attribute jfed:finished_flag has been added to the execute-tag:
<services>
<install install_path="/local" url="http://doc.ilabt.iminds.be/jfed-documentation-5.6/_static/install-ansible.tar.gz" />
<execute shell="sh" command="cd /local && sudo /bin/bash install-ansible.sh"
jfed:finished_flag="/tmp/ansible-install-finished"/>
</services>
This attribute must contain the location of a file that will be created (touch-ed) at the end of the script. This way, jFed knows the script has finished executing, and can continue the provisioning process. An example of a script installing ansible can be found here.
Feature: Dynamic inventory generation
jFed can automatically generate an inventory file. To allow differentiation between nodes, you can use <jfed:ansible_group>-tags to add a node to one or more groups in the inventory.
For example:
<node client_id="serverA" exclusive="true" component_manager_id="urn:publicid:IDN+wall2.ilabt.iminds.be+authority+cm">
   <sliver_type name="raw-pc"/>
   <jfed:ansible_group name="server"/>
</node>
Will result in:
[server]
serverA  ansible_host=n063-17a.wall2.ilabt.iminds.be
This inventory file will be uploaded to the location specified in <jfed:ansible inventory="/MY/LOCATION">.
Feature: Executing an Ansible playbook
~~~^^^^^^^^^~~~~~~~~~~~~~~~~~~~~~~~~~~
To request the execution of an Ansible playbook, you must add a <jfed:ansible>-tag to the <services>-tag of a node.
This tag has the following arguments:
- galaxy-command: The command necessary to execute Ansible Galaxy. Defaults to
ansible-galaxy - install_requirements: A absolute path of a file containing all the ansible ‘roles’ to be installed by Ansible Galaxy
- inventory: The absolute path where jFed must upload the dynamically created files to
- playbook-command: The command necessary to execute Ansible Playbook. Defaults to
ansible-playbook. - execute_playbook: The absolute path to the playbook that must be executed by Ansible Playbook
- debug: request extra verbose output from Ansible (equivalent to executing ansible with
-v)
For example:
<jfed:ansible
       galaxy-command="sudo ansible-galaxy"
       install_requirements="/local/my_repo/playbooks/ansible-requirements.yml"

       inventory="/local/my_repo/playbooks/hosts"

       playbook-command="sudo ansible-playbook"
       execute_playbook="/local/my_repo/playbooks/main.yml"

       debug="true"
 />
Shortcuts
General shortcuts
F1Open documentationF2Report a BugF12Preferences
Experiment definition
CTRL+NNew experiment definitionCTRL+OOpen experiment definition from fileCTRL+SHIFT+OOpen experiment definition from URLCTRL+SSave experiment definitionCTRL+PRun experiment
Topology editor
CTRL+CCopy selected elementCTRL+VPasteCTRL+DDuplicate selected elementCTRL+LAuto LayoutCTRL++Zoom inCTRL+-Zoom outCTRL+0Reset zoom
RSpec editor
CTRL+ALT+LFormat RSpecCTRL+ALT+VVerify RSpecCTRL+FSearchCTRL+SHIFT+FSearch & Replace
Timeline editor
ALT+INSERTAdd commandCTRL+BAdd barrierCTRL++Zoom inCTRL+-Zoom outCTRL+0Reset zoom
Experiment
CTRL+RRecover experimentCTRL+SHIFT+ROpen shared experimentCTRL+SHIFT+RShare experimentCTRL+ALT+SSave ManifestCTRL+SHIFT+SSave node login information (to CSV)CTRL+TTerminate experimentCTRL+ALT+TReboot experimentF5Update statusF6Renew experimentF10Edit SSH-keys
Topology viewer
CTRL+LAuto LayoutCTRL++Zoom inCTRL+-Zoom outCTRL+0Reset zoom
Timeline viewer
ALT+RStartALT+PPauseALT+TStopCTRL+IInstant commandALT+SSave resultsALT+INSERTAdd commandCTRL+BAdd barrier
Caveats for specific testbeds
C-Lab
C-Lab uses a closed control network only accessible through VPN, and with IPv6 addresses. C-Lab nodes can be found under the wireless button in jFed.
In jFed you should do three things to enable SSH login while right clicking on a node:
- use jFed compile 1331 or later: http://jfed.iminds.be/releases/r1331/ (click Experimenter GUI - Launch Webstart)
- use jFed proxy for SSH connections (see preferences)
- as C-Lab uses raw IPv6 addresses, if you use Putty on windows, you have to upgrade plink to the newest version: substitute C:\Program Files (x86)\PuTTY\plink.exe by http://tartarus.org/~simon/putty-snapshots/x86/plink.exe
Frequently asked questions (FAQ)
OS support
- jFed experimenter GUI now requires java 8 on all platforms. Only the oracle implementation is tested.
- Older versions will run on java 7, but only with at least Oracle Java 7 install (Update 55 or higher). On Linux, your mileage may vary with these older version, they tend to freeze on some Ubuntus e.g.
- jFed currently does not support Open JDK. It should in theory work if you correctly install OpenJXF, but this is untested.
Install problems
Be sure to run a recent Java 8, verify with http://java.com/verify and/or java -version.
If you have 2 java installations on your PC, you may revert to the command line start up of the Java 8 one, by downloading from http://jfed.iminds.be/releases/
the latest release and take the Experimenter GUI - Download jar.
Run this with something comparable to:
C:\Users\bvermeul\Downloads>"c:\Program Files (x86)\Java\jdk1.8.0_X\bin\java.exe" -jar "jFed-experimenter-GUI.jar"
This will help also to show you console output to detect what is wrong.
SSH login problems
- If you do not get connection to the node, try to enable the proxy support in the preferences
- If it still keeps saying
Server refuses key, check in Putty on Windows that there is no fixed private key in the default settings of Putty (Connection - SSH - Auth - Private key file for authentication) - If you used “Edit SSH Keys” but can’t login afterwards, one possible reason is that “Edit SSH Keys” needs to assign specific uid’s for the added users. So if any boot script or manual editing on the node has added a user without specifying a uid, the needed uid will not be available and sharing SSH keys won’t work.
Linux SSH terminal
Not all linux systems have the same SSH terminal, but if the default one does not work (when you right click a node when it is green, no SSH terminal opens), you can change terminals in jFed preferences as shown below.
Terminals to try:
konsole -e %
gnome-terminal -e '%'      (quotes should be right !)
xterm -e %
x-terminal-emulator -e %
